

How To Smoothen Skin In Photoshop
Sometimes, your task while editing is to create a composite image from two different elements. Or to remove the crowd in front of the Colosseum. Or to create a nice vignette of a man you respect.
In all these cases, the question of how to use smooth edges in Photoshop inevitably arises. In particular, this skill is necessary to make a composite image look natural. (For those interested in funny collage styles, the basic functionality of Paint is at your service.)

To address this need for smooth edges, we've designed this step-by-step guide. Check it out and learn how to use smooth edges in Photoshop (or how to feather in Photoshop). For your convenience, the commonly problematic steps in the sections on feathering edges (Photoshop) and refining smooth edges (Photoshop) are accompanied with answers and useful tips.
So let's start the enjoyable, creative, and smooth process of creating blurred edges in your photos!
Stage 1. Extracting a photo: basic adjustments

To start softening your edges, you should create a proper selection for the foreground. For this, Refine Edge (Photoshop) is a useful tool.
Note: Refine Edge may be absent in newer versions of Photoshop, so our guide includes a more sophisticated path for accessing the Refine Edge brush tool. At the same time, some people skip this step and proceed to Photoshop feather directly.
It's up to you what to chose. Just keep in mind that the more prepared your raw material (in our case, the selected image), the easier you'll fit it into a new photo.
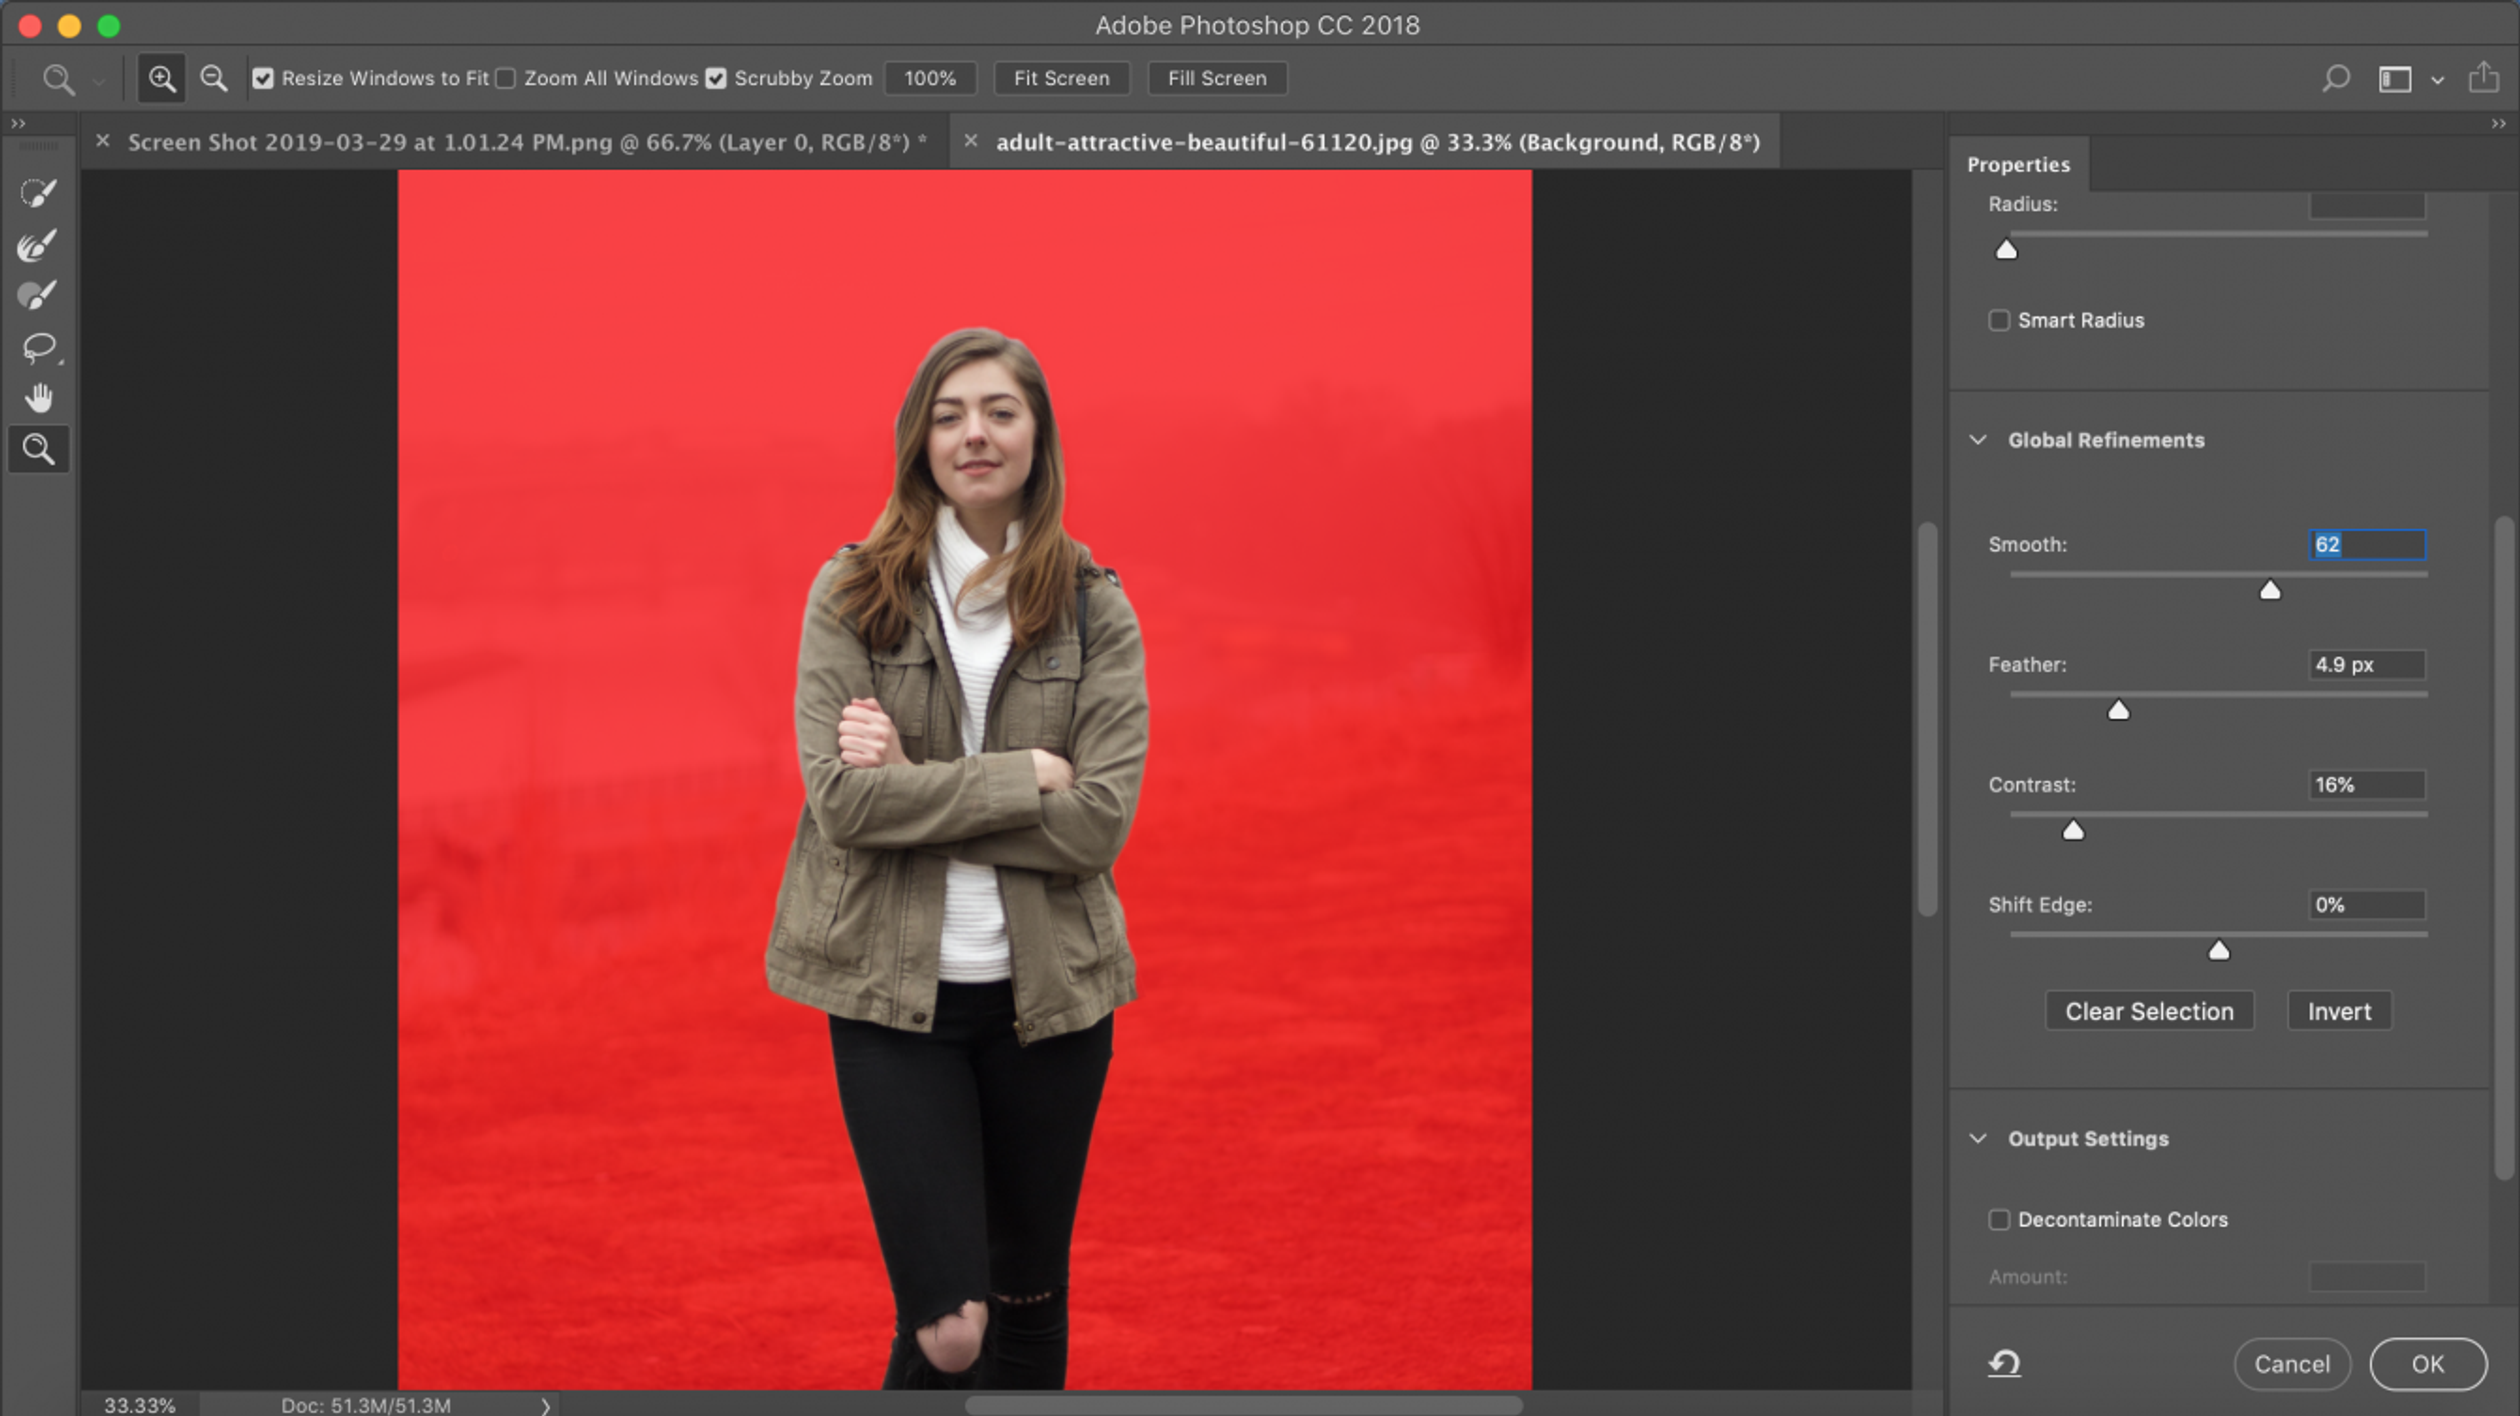
If you want to use the Refine Edge function, follow these steps:
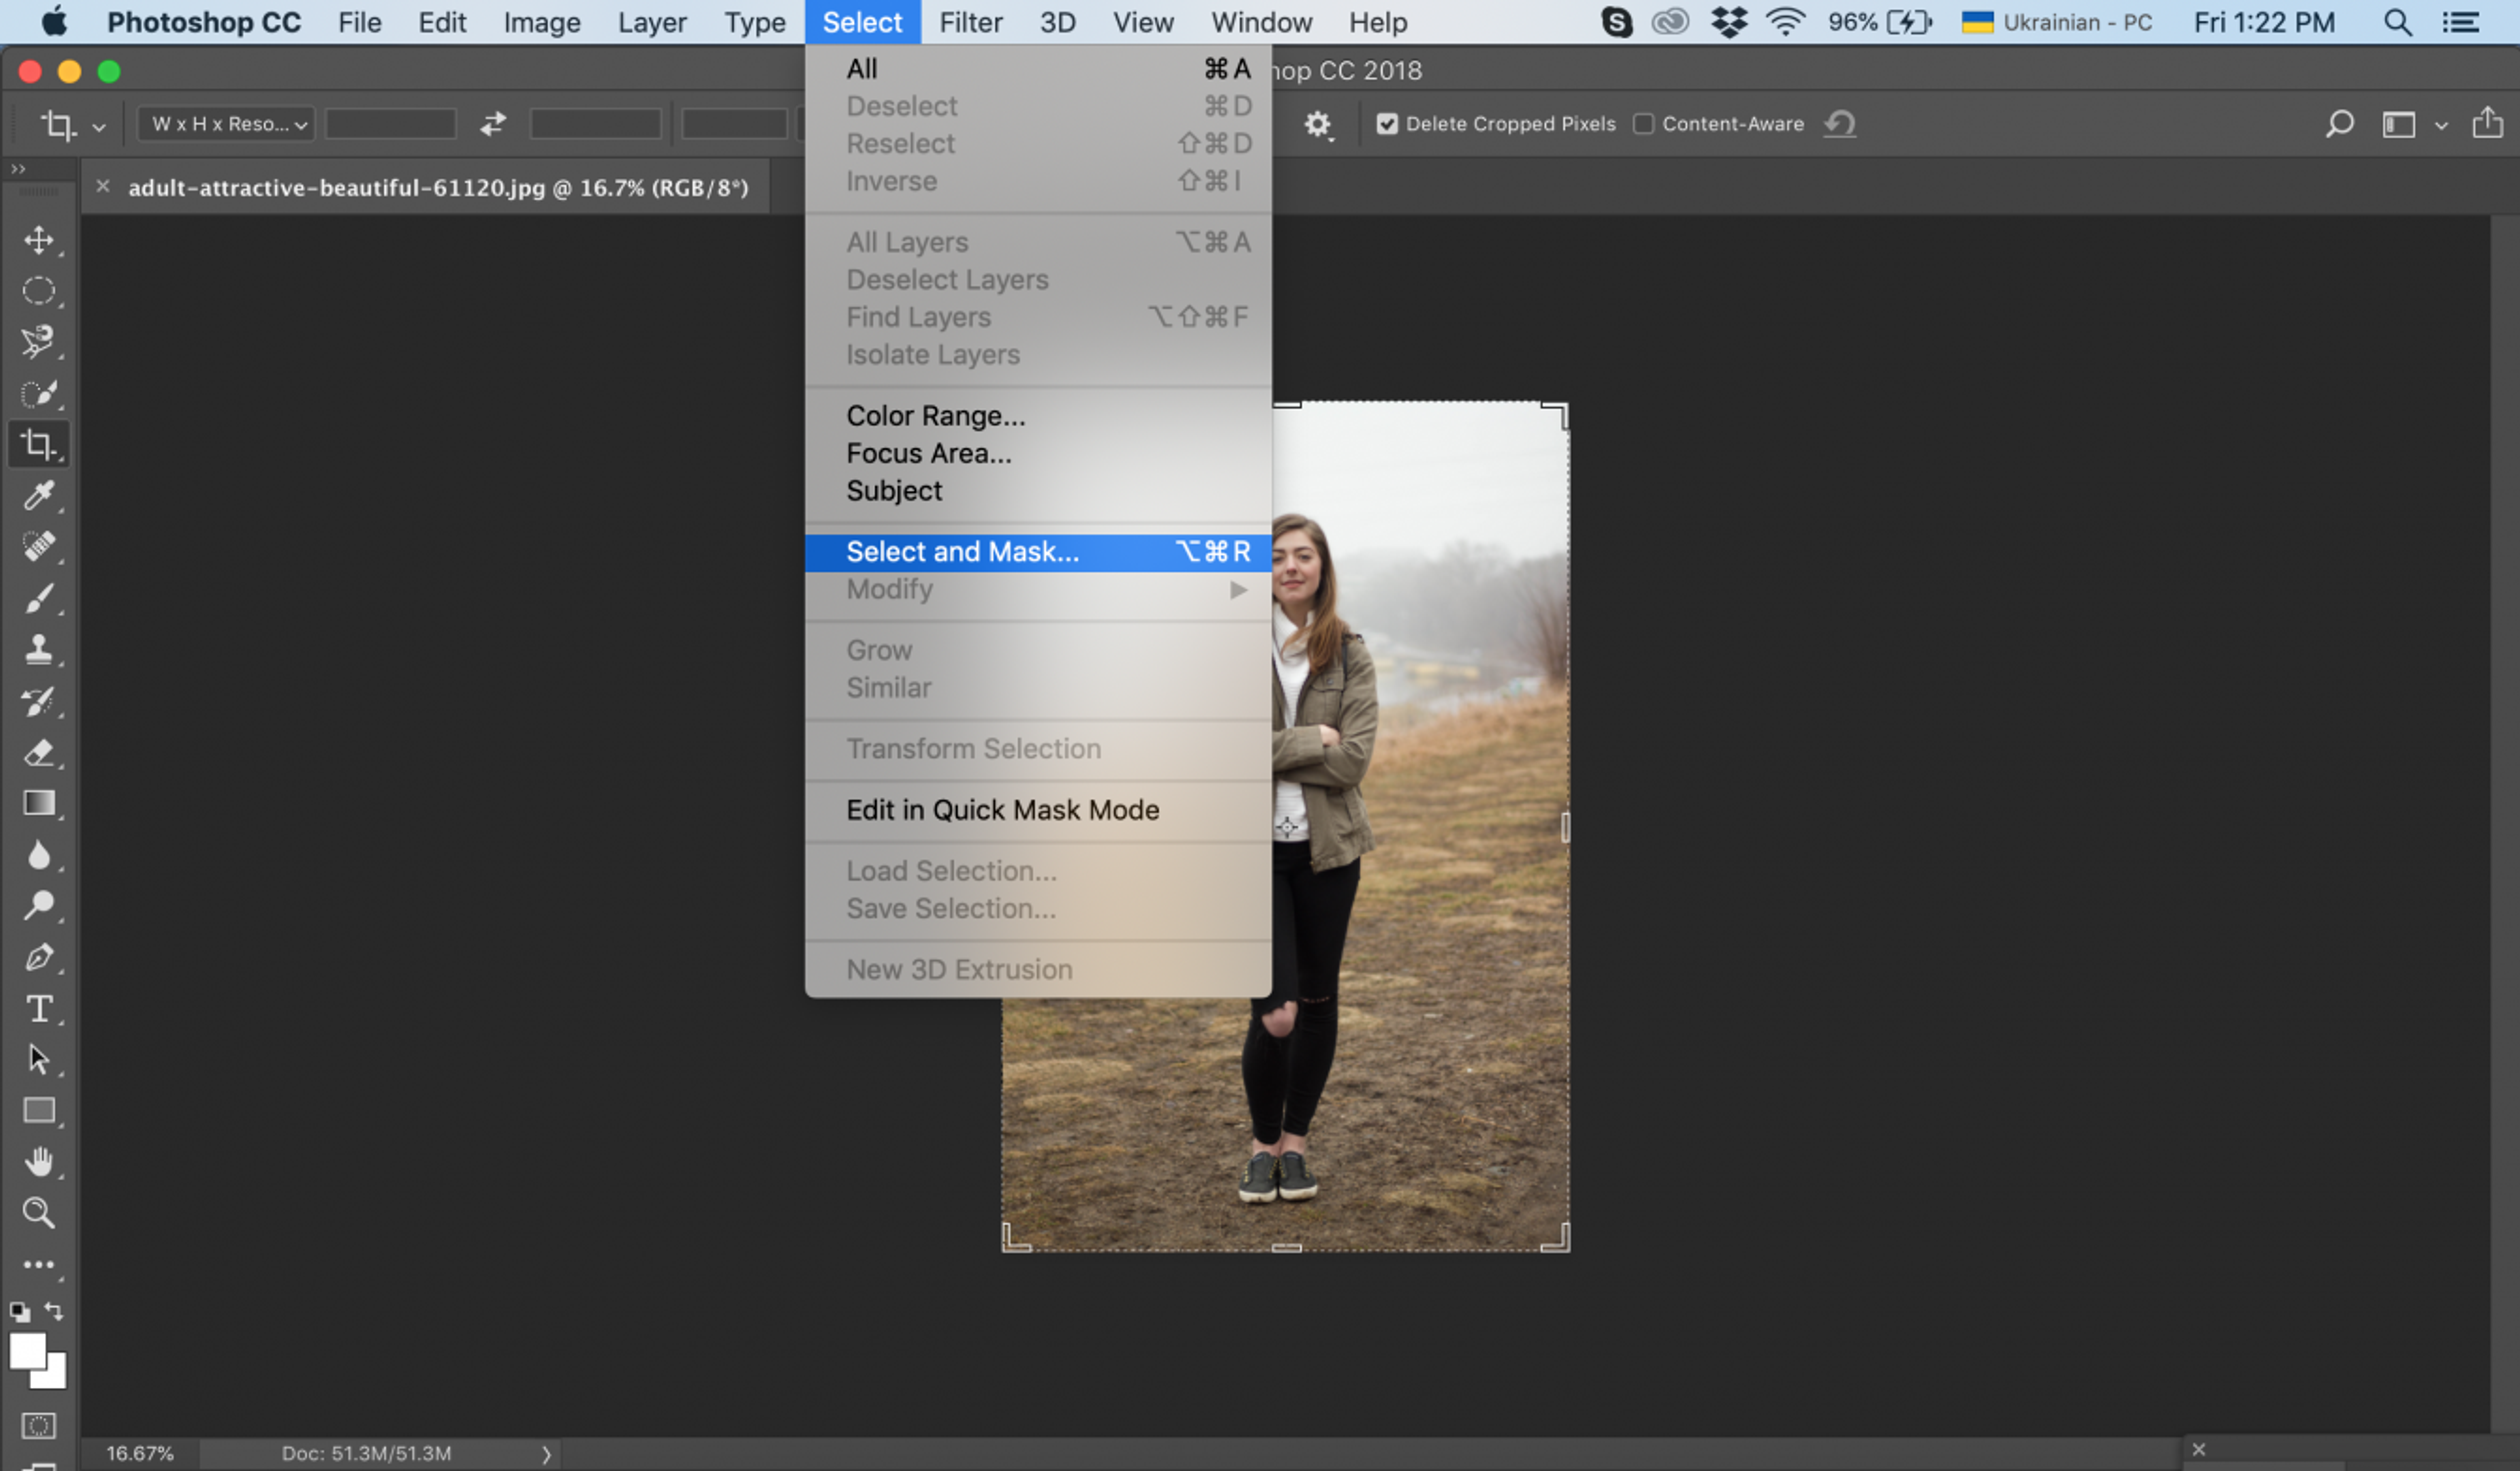
- Choose the Select menu and proceed to Select and Mask. Alternatively, use a quick selection tool (like Quick Selection, Magic Wand, or Lasso), then choose Select and Mask.
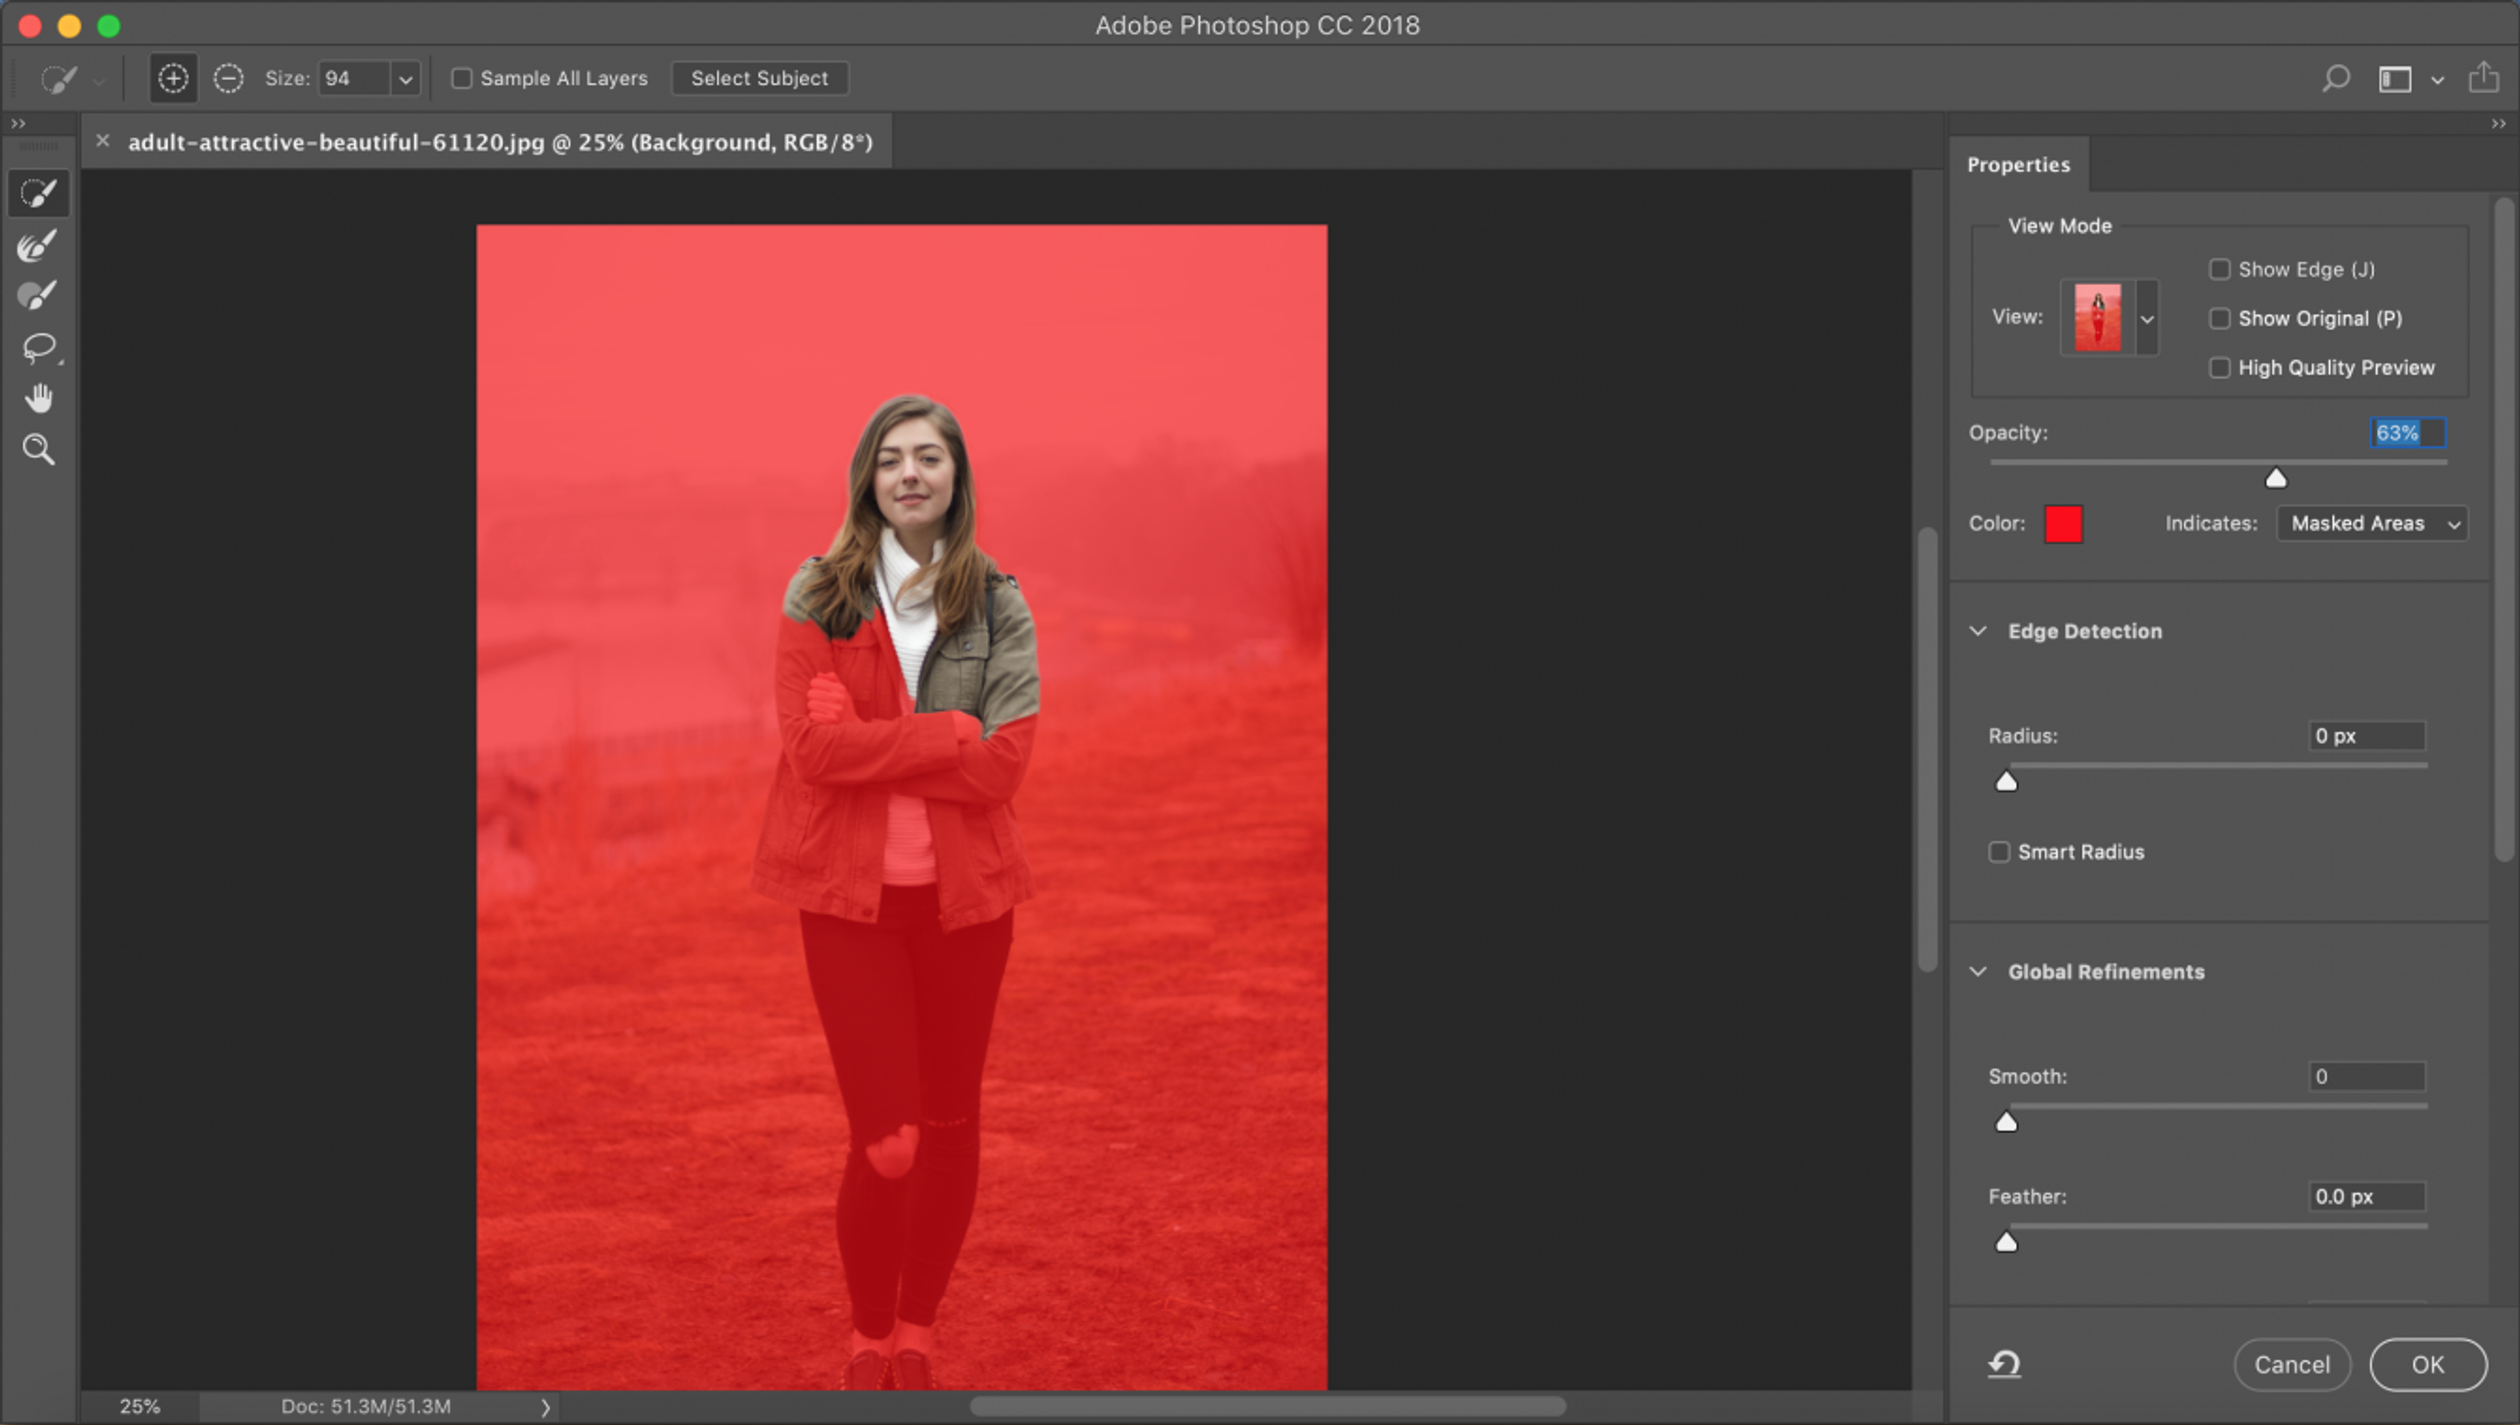
- Refine your selection using the functionality in the Properties Panel.
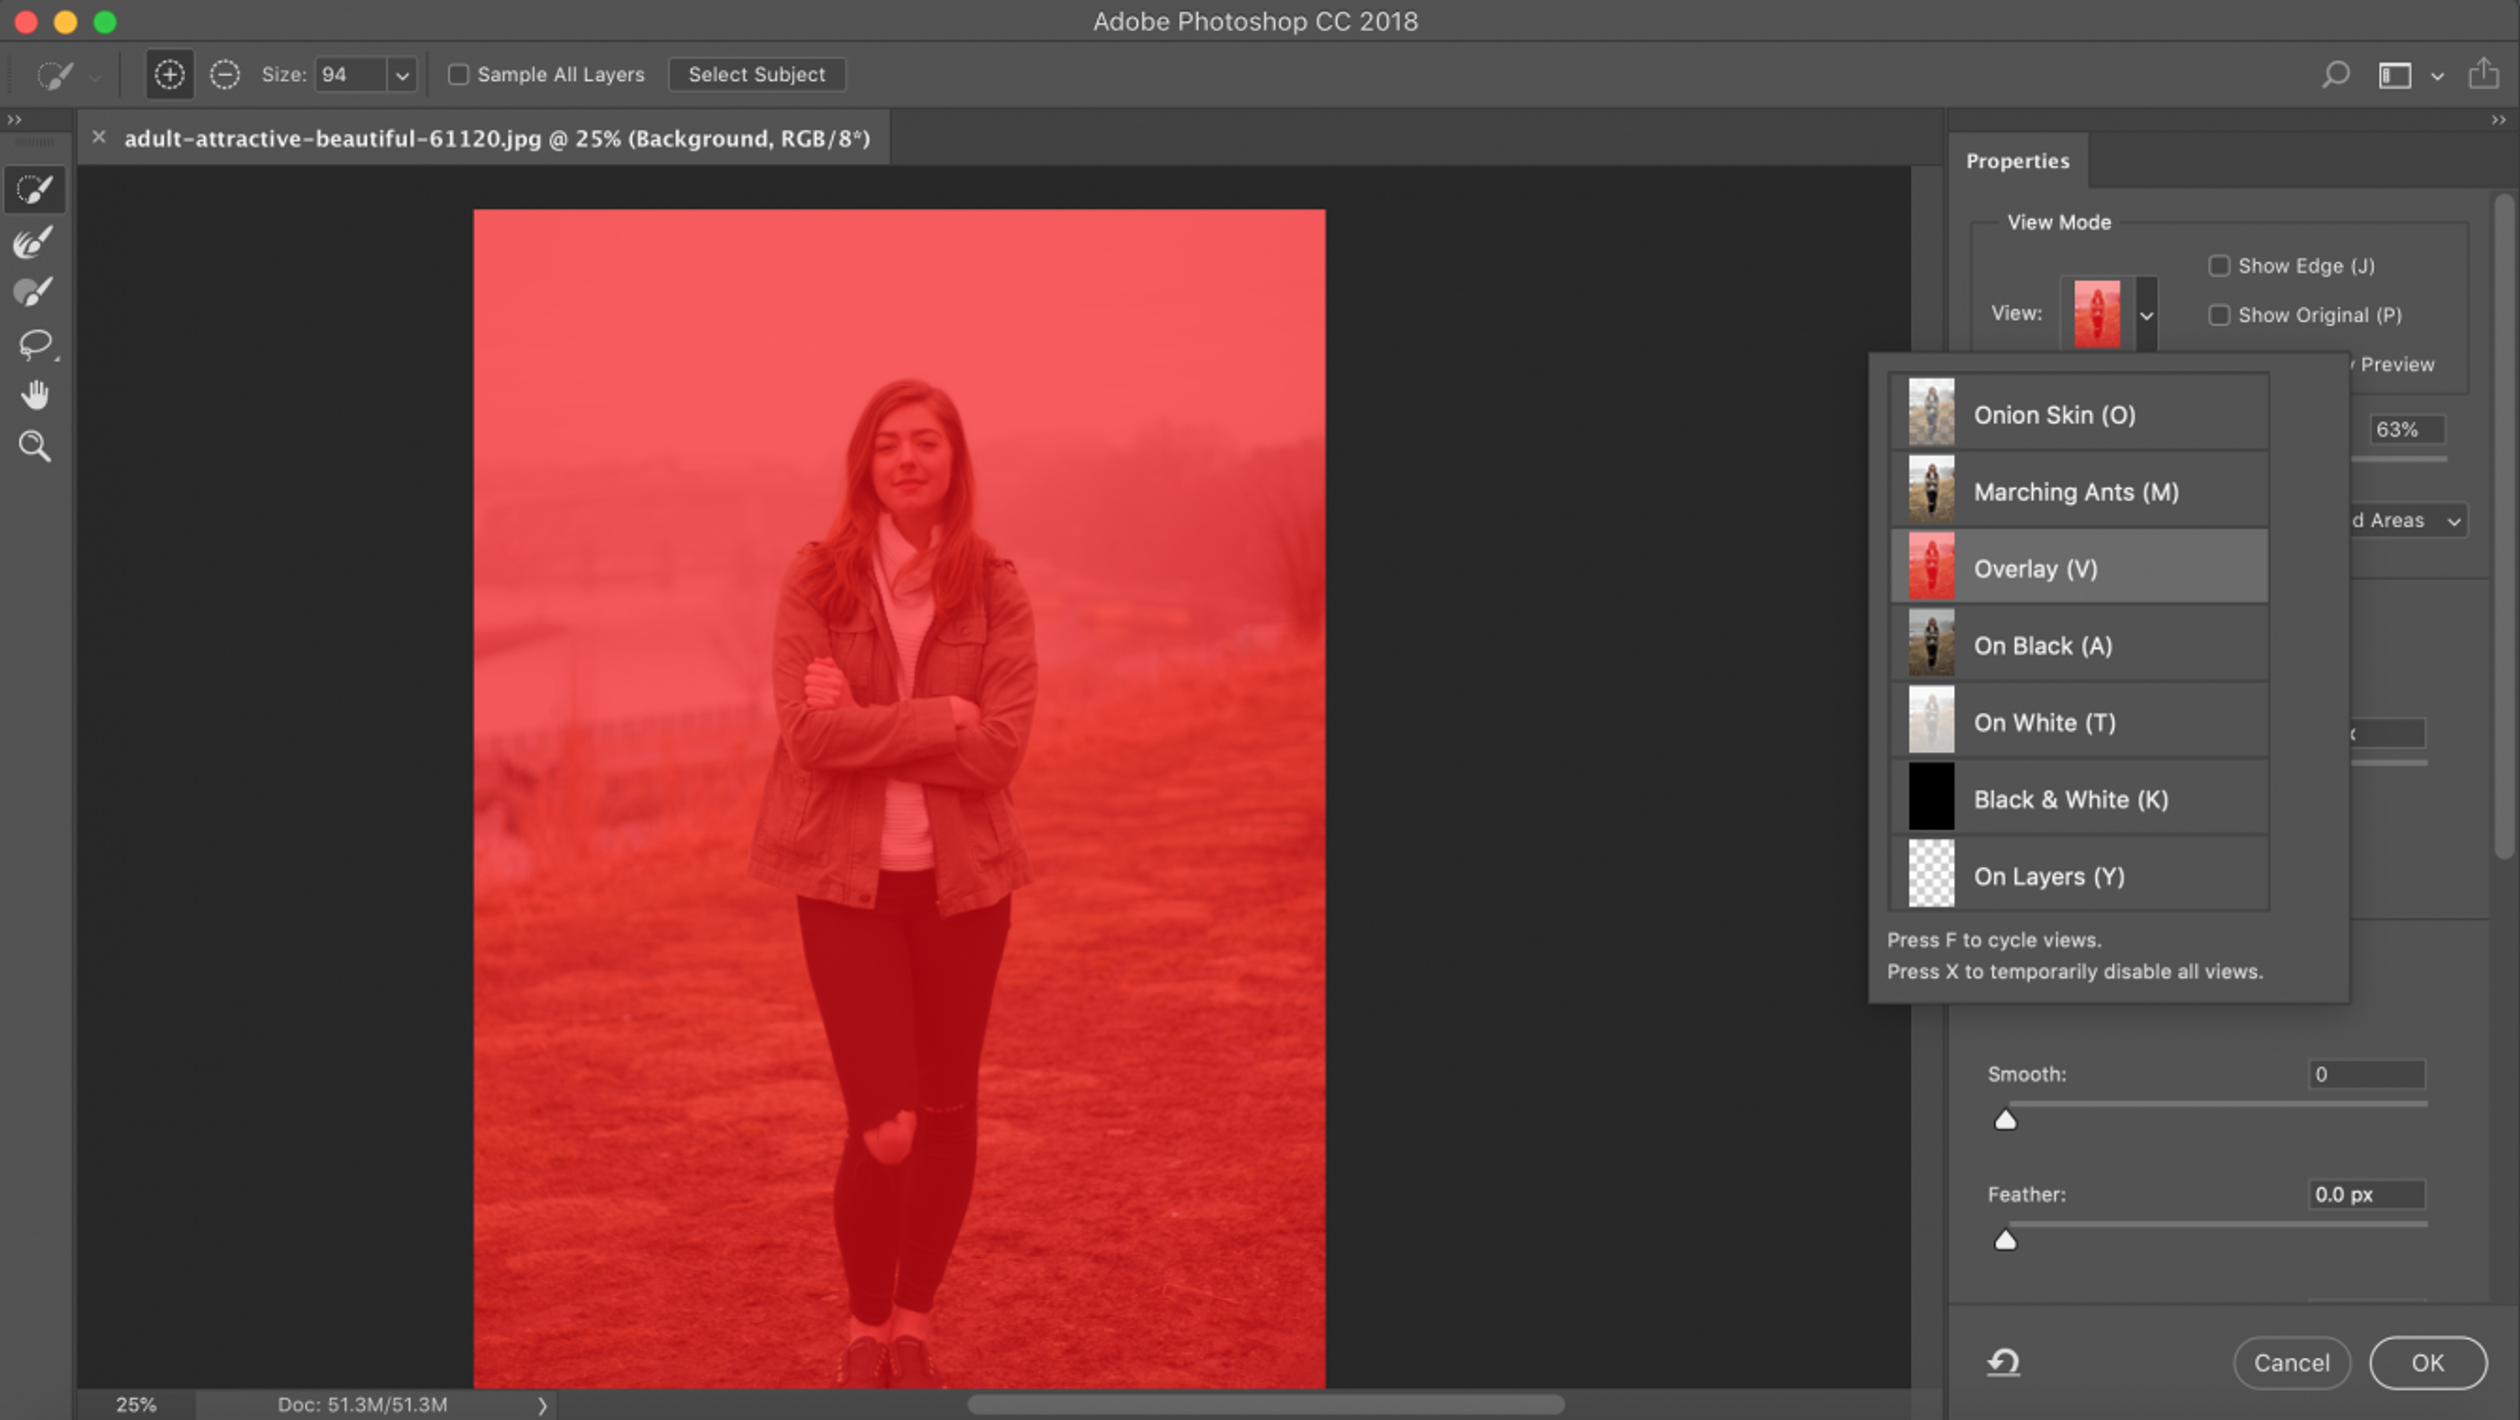
- Go to View Mode to choose how the selection preview is presented (Onion Skin, Marching Ants, Overlay, On Black, On White, Black & White, or On Layers) and refer to the Opacity slider to adjust it.
- Use the Quick Selection brush to make broad-brush changes to the selection.
- Use the Refine Edge brush to make precise adjustments.
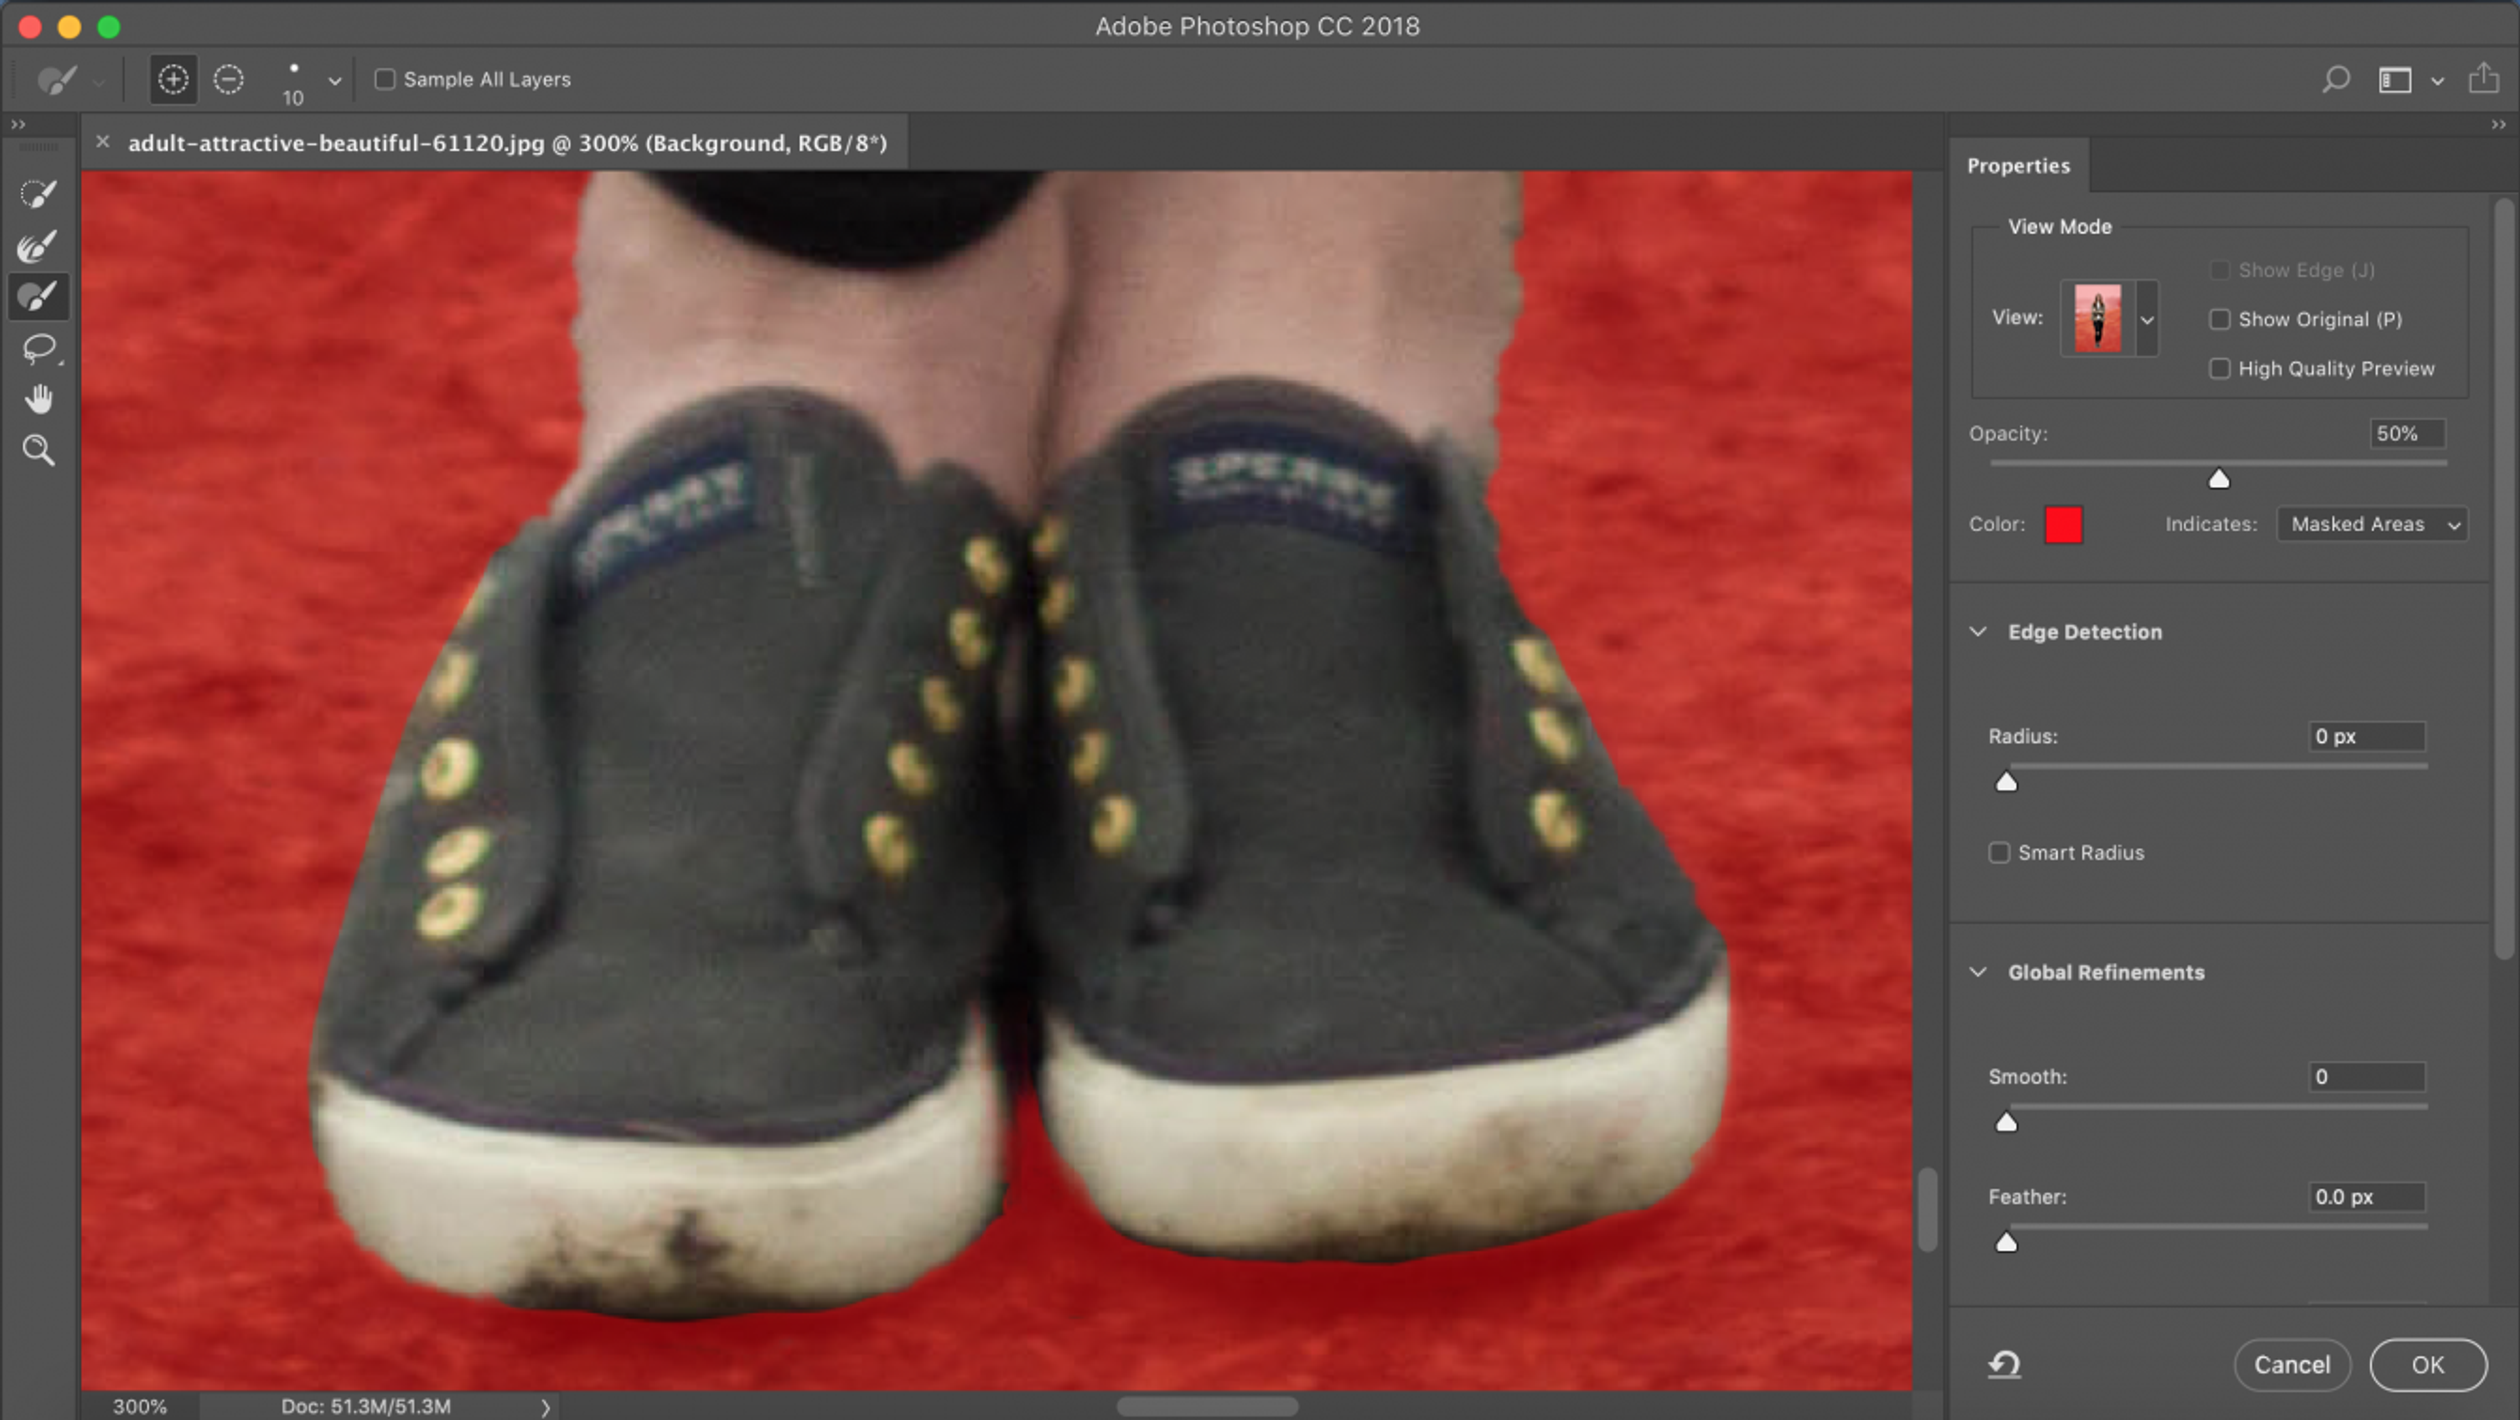
- Add final improvements with the Brush tool.
Stage 2. Feather Edges (Photoshop option): the most common way to refine your selection
In general, Photoshop feather is used for softening the transition between a selection and a background. This tool perfectly addresses the concern of how to use smooth edges in Photoshop. Moreover, most people use only this tool and achieve awesome results.
So how can you use Photoshop feather correctly and effectively? This simple guide is the answer:
- The first way is to adjust your settings in Properties Menu after the masking process.
- Here is the result when you paste your selection on the new layer:

- Access the Marquee tool to make a selection that you'll copy and paste on the new image later (complete this step if you skipped the previous stage). Which form of marquee should I choose? There are two types of shapes available. For rectangular and square selections, it's better to choose the Rectangular Marquee tool. For round images, the Ellipse Marquee option will work better.
- Drag your cursor around the image to create a border (the space for those smooth edges Photoshop introduces).
- Access the Feather tool through the Modify option in the Select main menu.
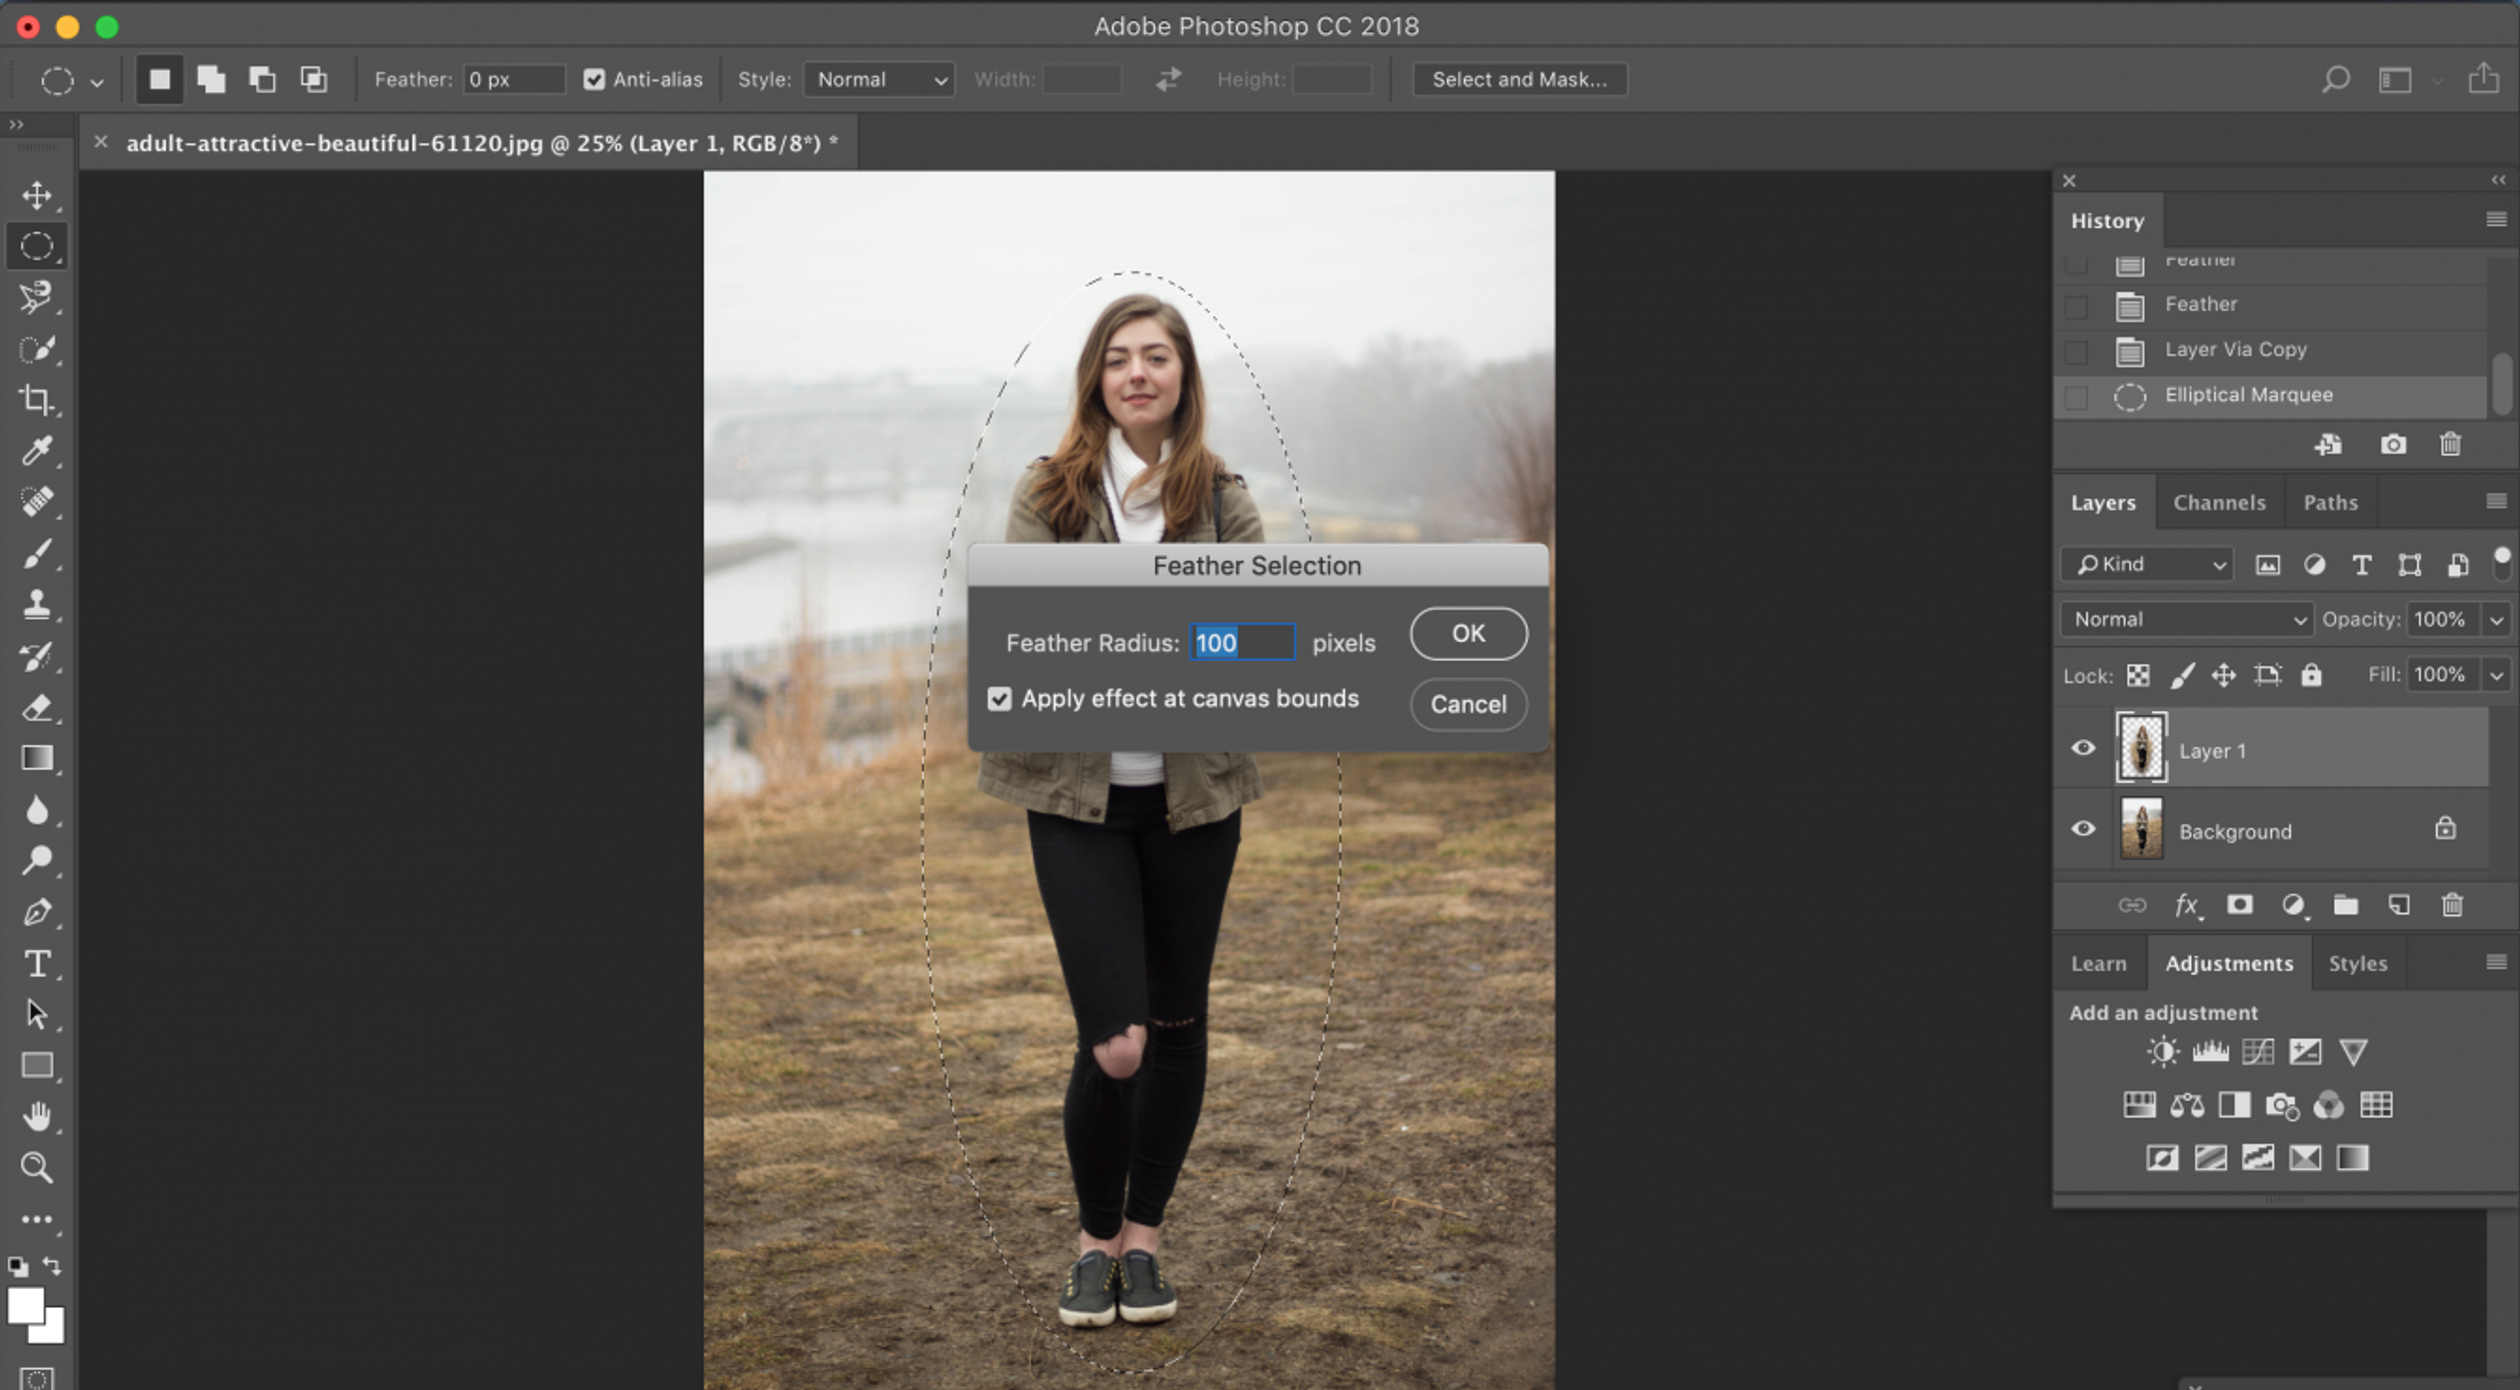
- Choose the value of your Photoshop feather in the dialog box by typing a number in the Feather Radius field.
Wondering how to feather in Photoshop correctly? The feather radius you enter sets the number of pixels by which the edges of your selection will be softened. So feel free to play with these numbers. For a good start, choose something between 20 and 30.
Wondering how to use smooth edges in Photoshop better if the soft edges become too wide? In this case, simply repeat the previous step, but now enter a smaller number. In the opposite case, too narrow edges can be optimized by using a wider radius.
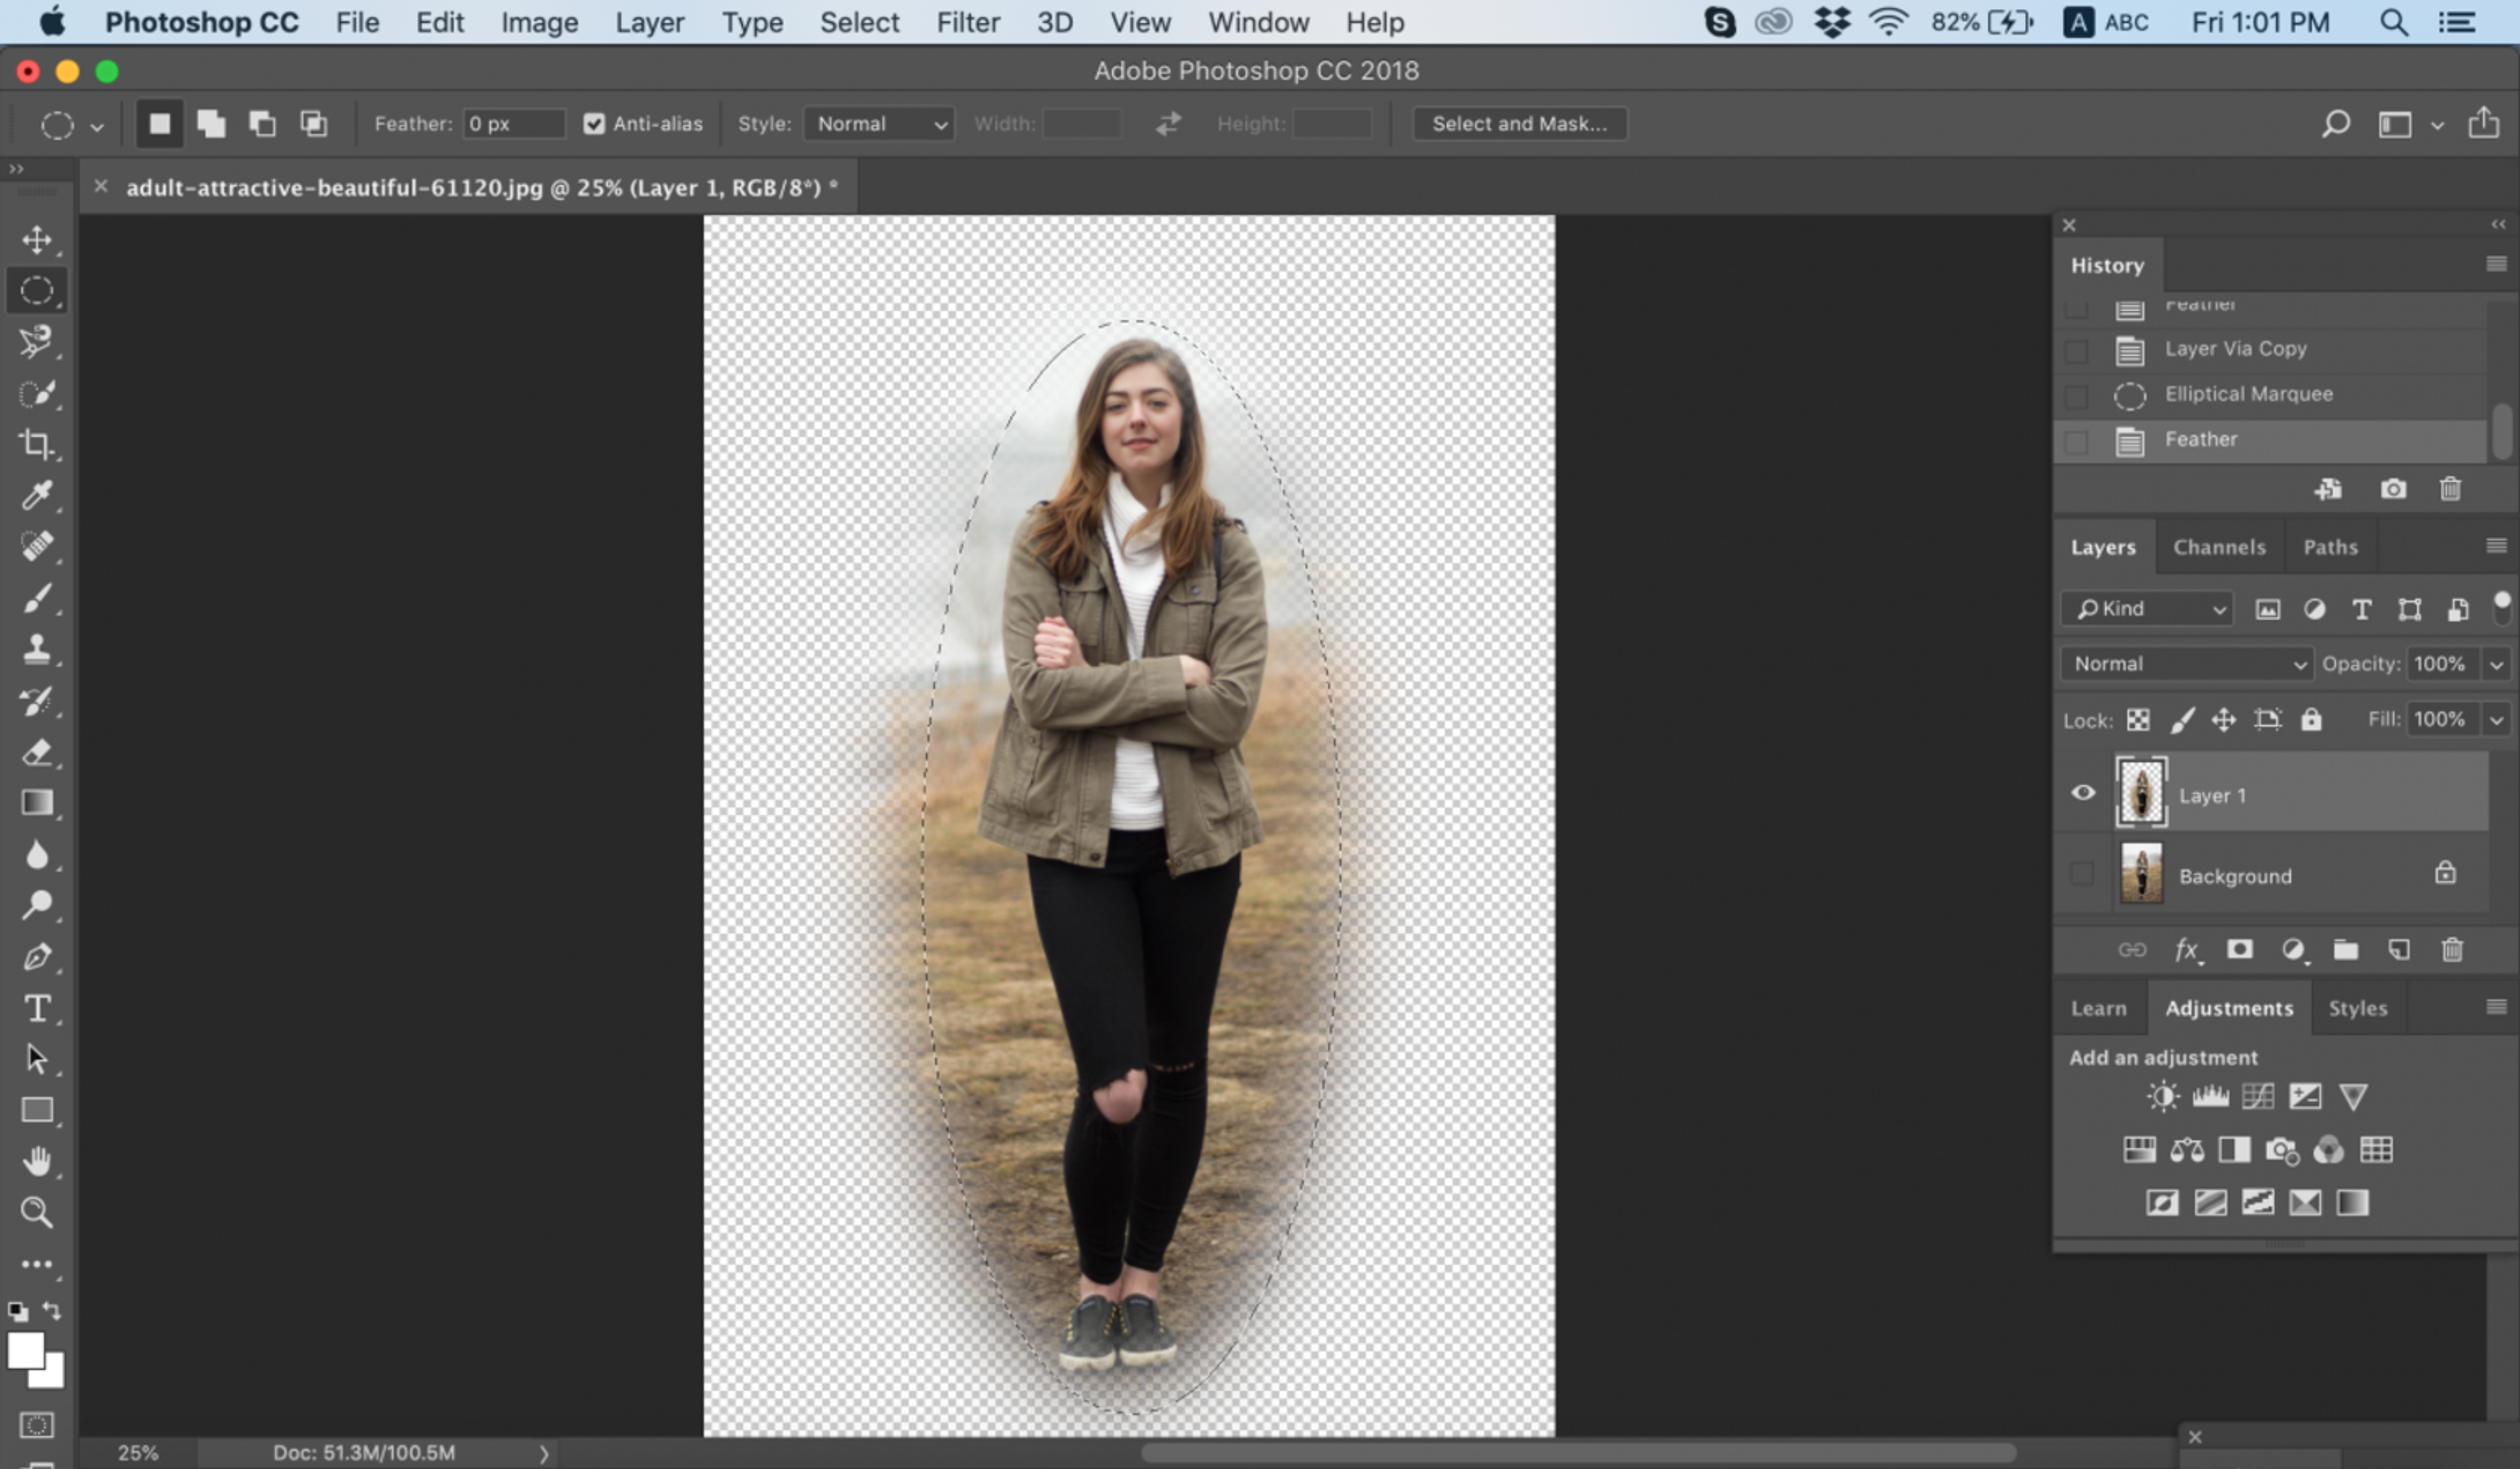
As a result of these actions, you'll receive a vignetted image.
In certain cases, that will be enough. However, most editing goals require further retouching of a photo after completing the adjustments with Photoshop feather.

Stage 3. Photoshop Blur Tool (or how to use smooth edges in Photoshop like a pro)
At the advanced level, the Photoshop blur tool is the best method to create a smooth transition in terms of lighting and to accurately merge two images.
So how can you make Photoshop blur edges properly?
1. Determine the harsh edges by holding Alt and using the mouse scroll wheel to zoom. You can still create Photoshop blur edges if you don't have a mouse. As an alternative, try the Zoom tool to view the edges that need to be refined.
2. Press ] or [ to adjust the size of the brush. Start adjusting the improper edges. What's the proper approach to choosing the brush size? We advise selecting a size that's slightly larger than the edge thickness. This will result in accurate blurring that doesn't touch the surrounding area.
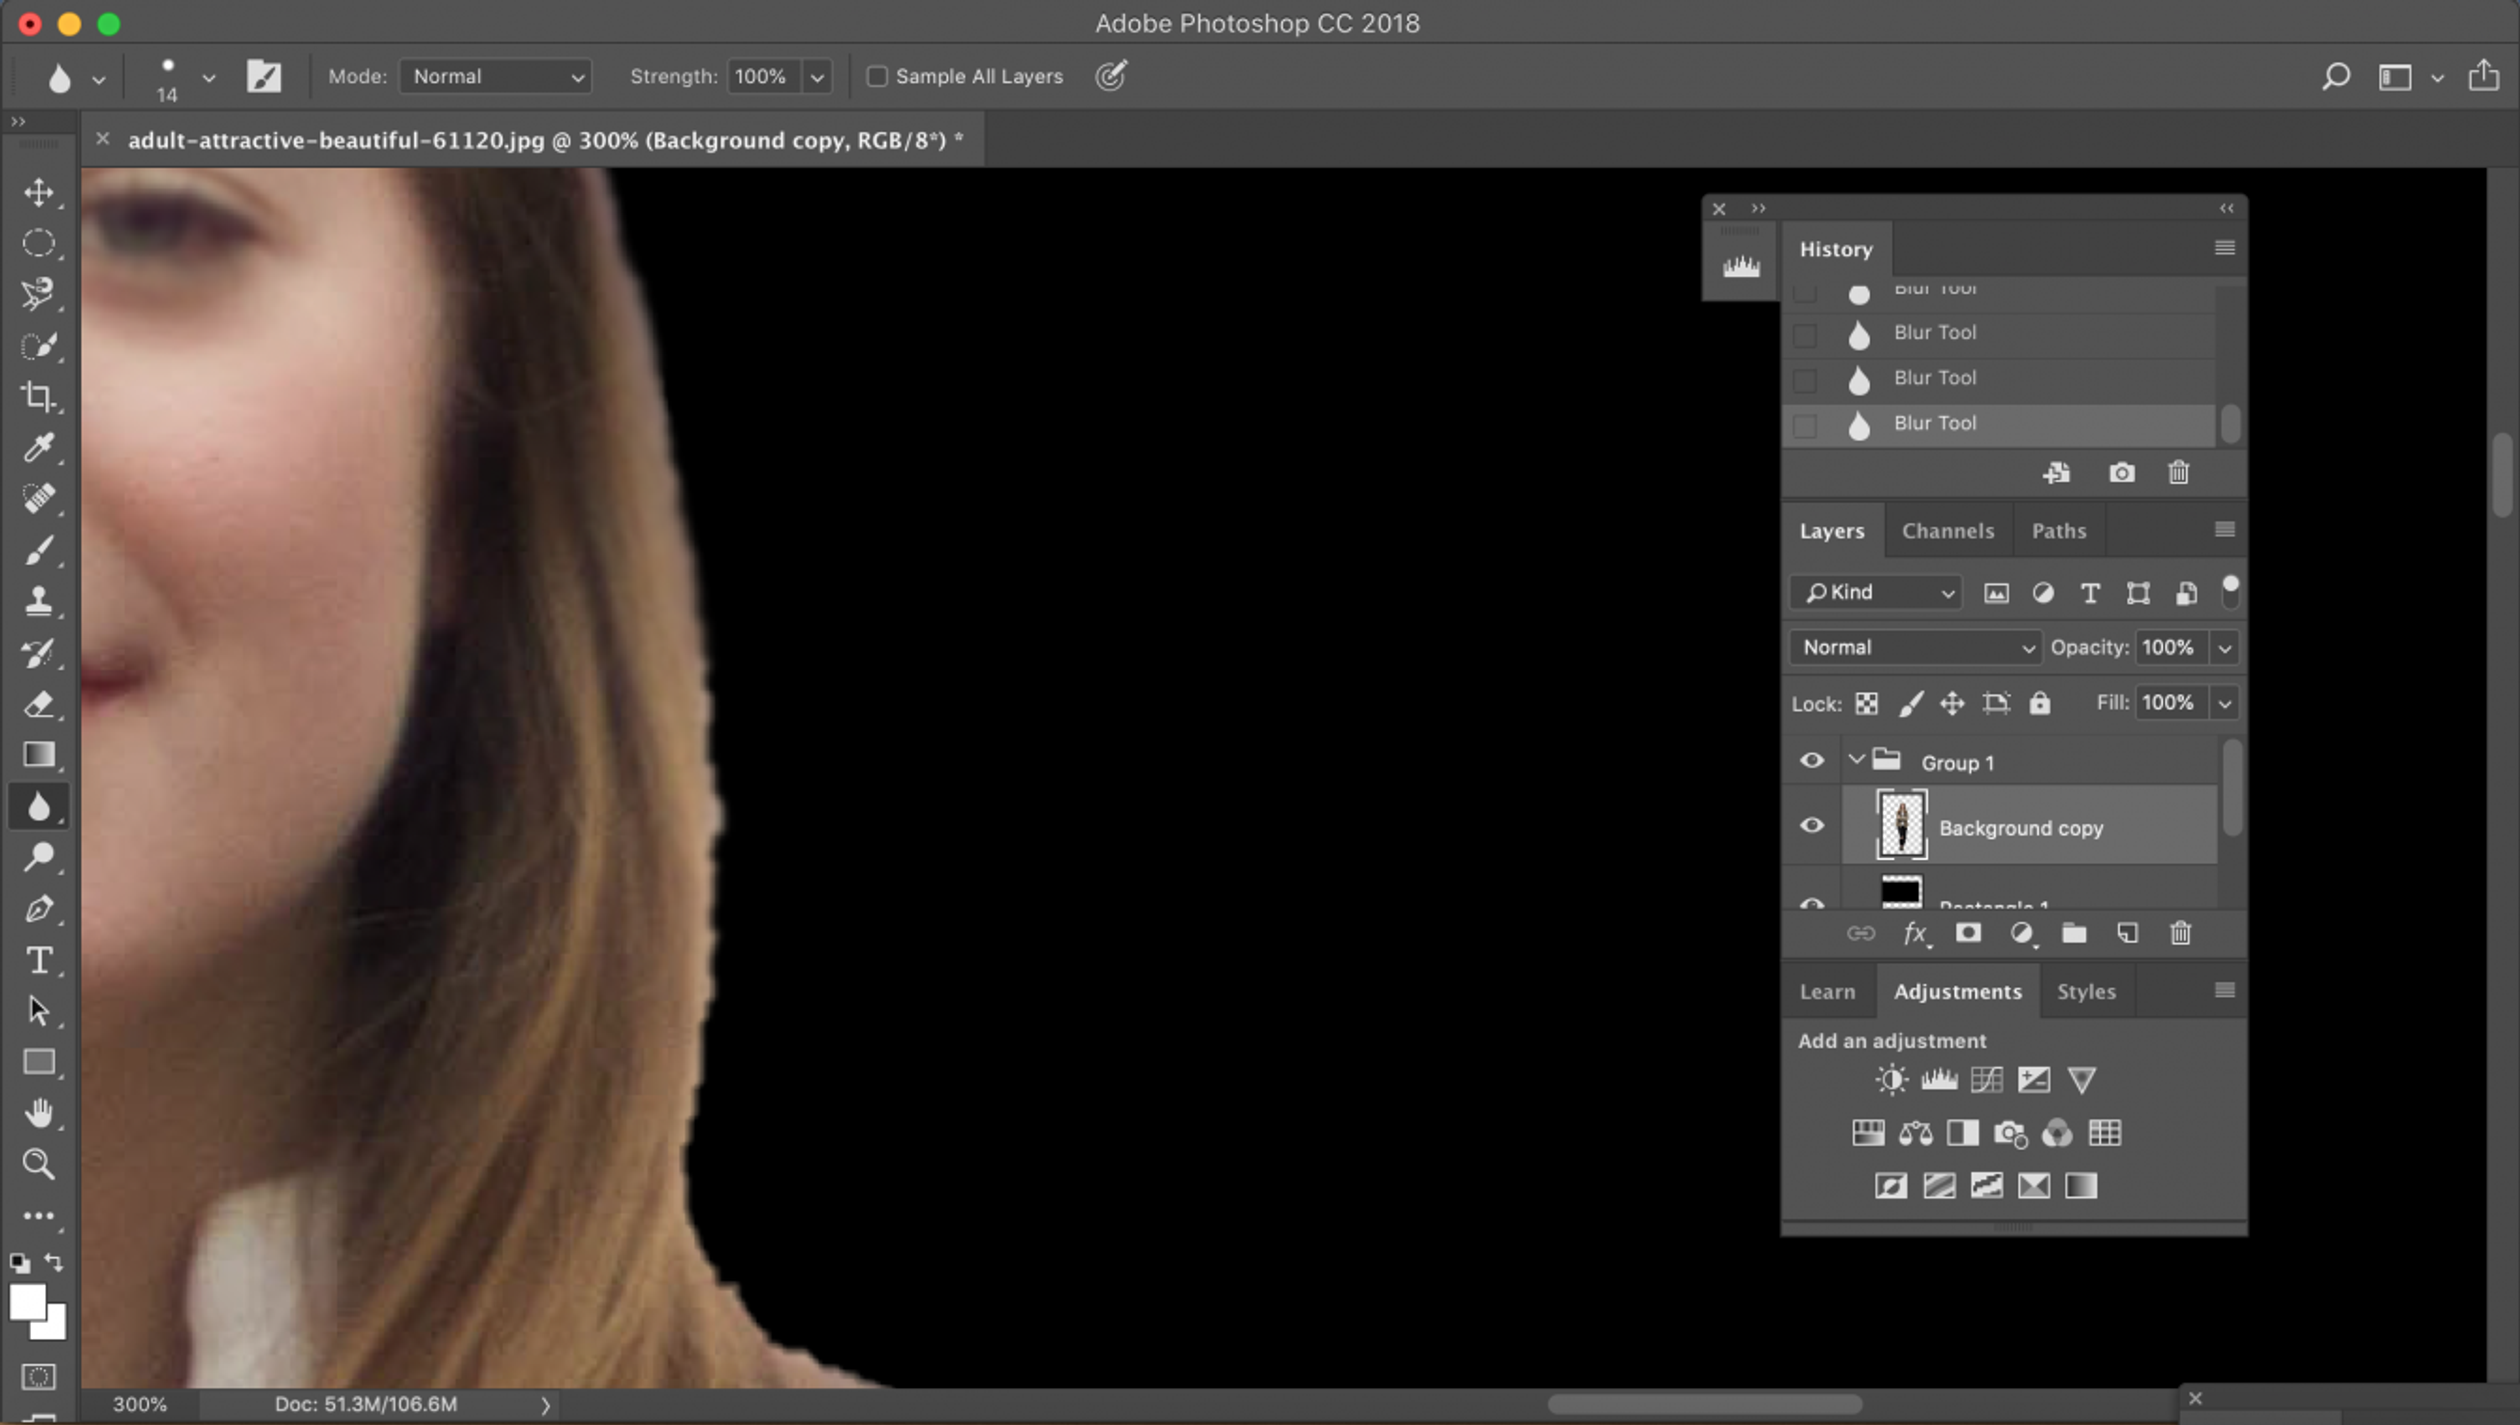
3. Use the Strength slider. To choose the value, consider the following: the higher the percentage, the more vivid the application of the Photoshop blur tool becomes.

Stage 4. Evaluate the result and consider post-processing
When applying so many magic tricks on the photo, it's important to stop and evaluate the result of each action. Check whether you've achieved the right effect at each stage:
Stage 1: The selection you wanted is completely present. In other words, you've chosen enough of the photo area so as not to cut something important after all the adjustments. Stage 2: The edges on your selections are of an optimal softness and don't appear harsh. Stage 3: All the details on the blurred edges are omitted.
If everything looks good, consider post-processing. After making so many important adjustments, all that you'll need is some basic editing that won't destroy the quality of your photo. We recommend checking out this photo color editor. It contains everything you'll need in a free trial version and many awesome ideas for your photos in a paid version of the product.
![]() Luminar3
Luminar3
Luminar 3 - Time Does Matter
The fastest way to make your photos stand out Complex photo editing made easy with
AI powered tools
- Accent AI 2.0
- AI Sky Enhancer
- More than 70 Instant Looks
- Quickly erase unwanted objects
- Denoise
- Sharpening
- And - More

Stage 5. In case something goes wrong, use a life preserver!
If you realize that after spending so much time and energy on creating smooth edges in Photoshop the result isn't good, don't get upset too early. There are several programs on the market that are simpler to use and can create soft edges of the same quality.
Here, we'll present the functionality of Luminar. In fact, Luminar can handle all the tasks we've described above – it even comes with a feather tool that's very similar to the Photoshop feather.
Among the numerous filters in Luminar is a filter for blurring edges. More precisely, this filter allows you to divide an image into layers and apply simple tools on each of them. For more information on this technique, check out this overview.
Moreover, masking is much easier in Luminar than in Photoshop. To assess its simplicity, read this review.
By covering all the basic needs for creating smooth edges and remaining simple and user-friendly, Luminar is a life preserver for those struggling with Photoshop. Don't hesitate to use it!
![]() Luminar3
Luminar3
Luminar 3 - Time Does Matter
The fastest way to make your photos stand out Complex photo editing made easy with
AI powered tools
- Accent AI 2.0
- AI Sky Enhancer
- More than 70 Instant Looks
- Quickly erase unwanted objects
- Denoise
- Sharpening
- And - More
How To Smoothen Skin In Photoshop
Source: https://skylum.com/how-to/how-to-smooth-edges-in-photoshop-photoshop-feather-and-other-tools
Posted by: pollardwhictibed.blogspot.com
0 Response to "How To Smoothen Skin In Photoshop"
Post a Comment