

How To Clean Sensor On Camera
How to Clean Camera Sensors: The Secret to Safely and Effectively Cleaning Sensor Dust
Have yous ever wondered what causes those mysterious spots that appear in your photos? For photographers, particularly those who use interchangeable lens cameras, this is a mutual occurrence.
If you are constantly using your photographic camera and switching lenses during photo shoots, then you've probably experienced this problem before.
These mysterious spots are acquired past dust or dirt on your sensor, which is completely normal and virtually unavoidable. To gainsay this problem, almost photographic camera makers accept included a sensor cleaning role in newer camera models. However, sometimes this handy little feature simply isn't plenty, which is why cleaning the camera sensor is a painstaking chore that every photographer has to deal with every so often.
What is sensor dust?
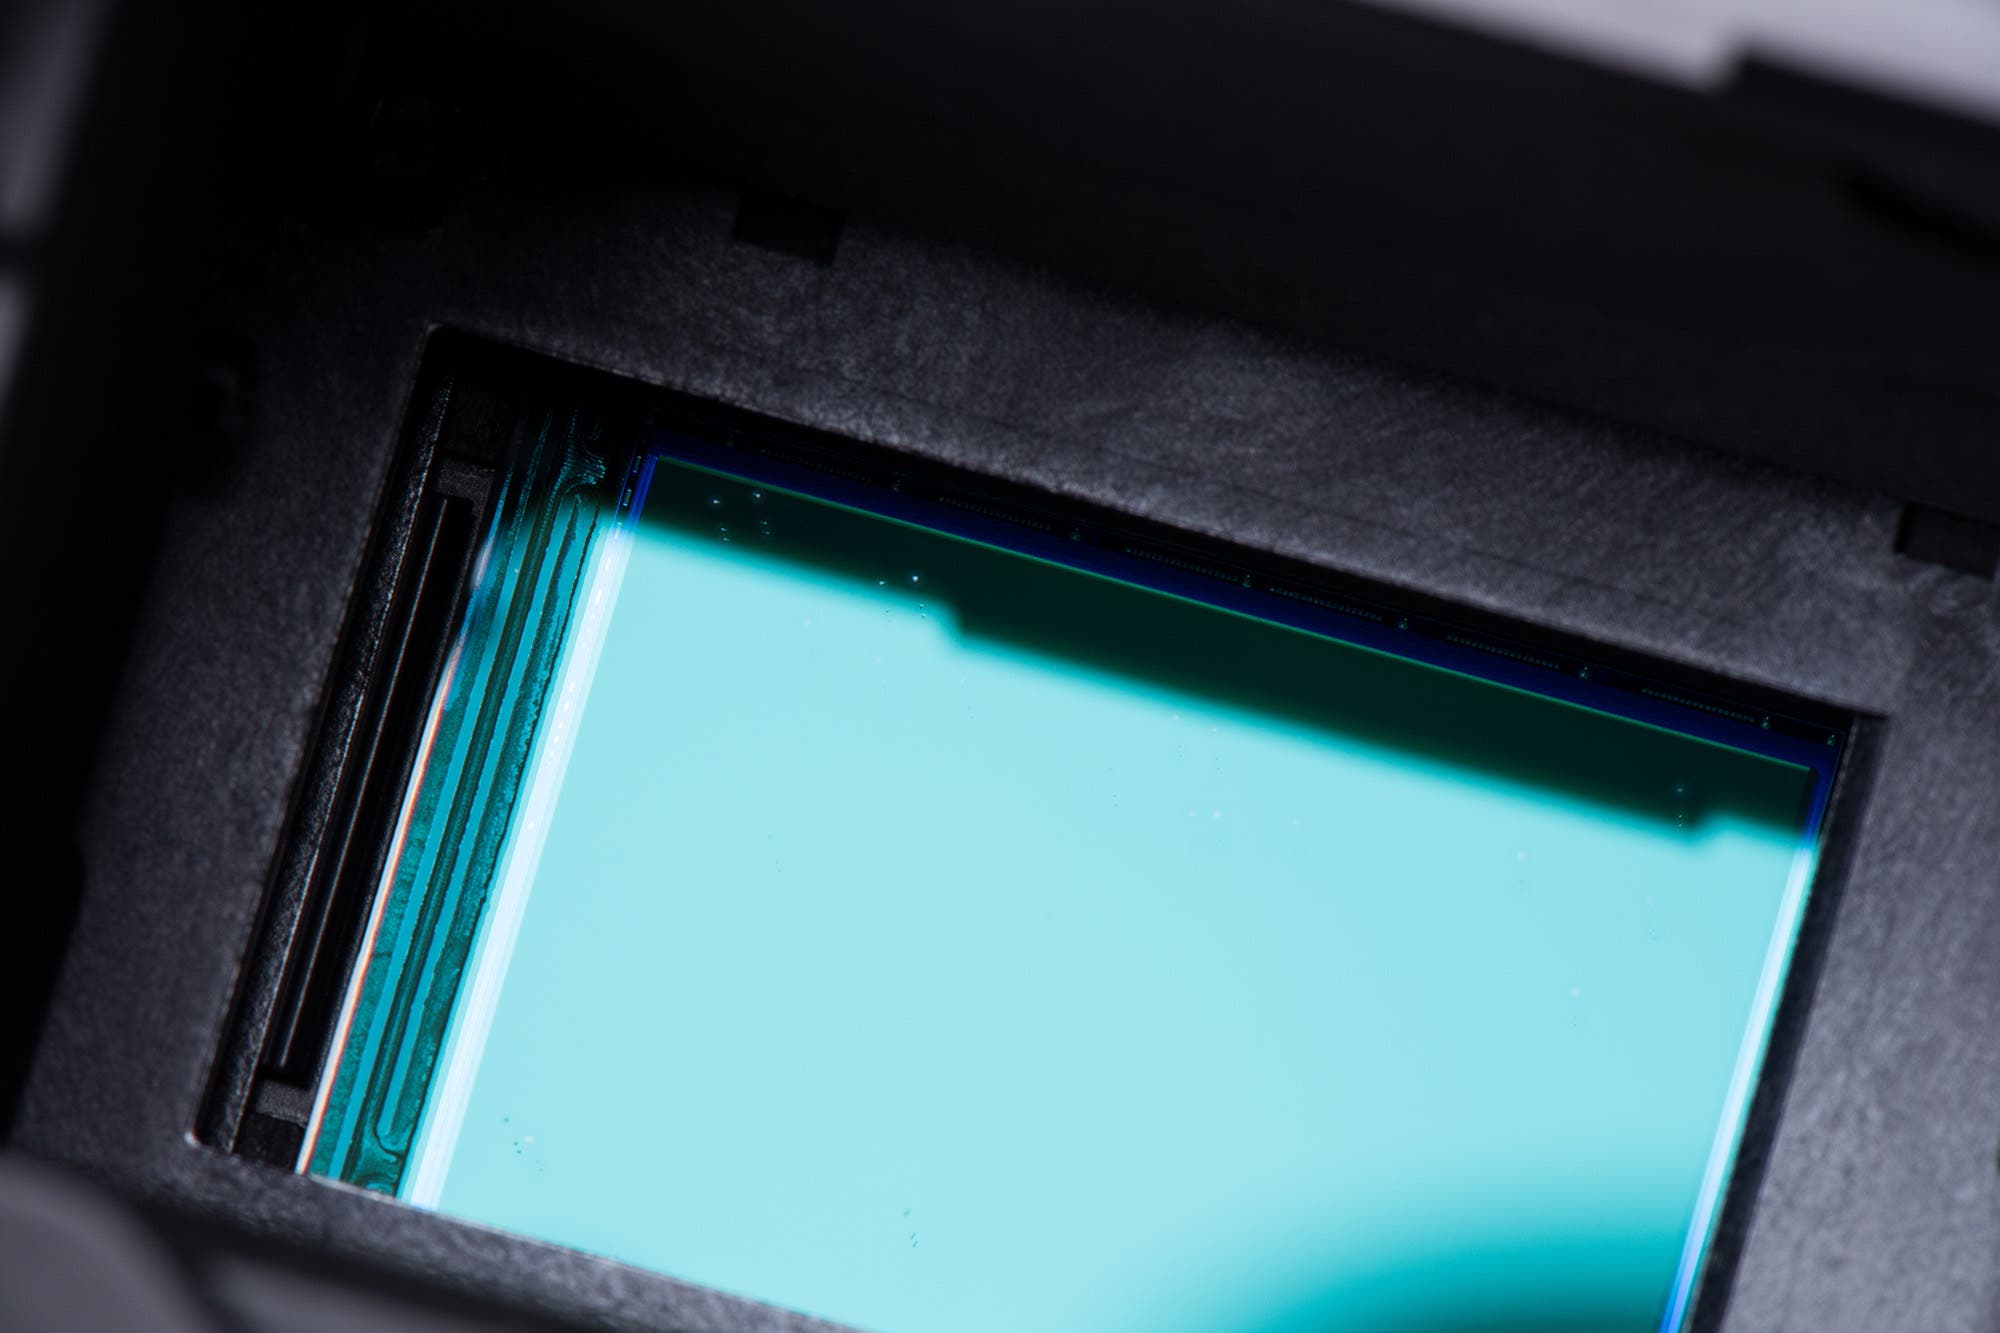
The term sensor dust is used to depict the particles or elements that enter a photographic camera and stick to its sensor. This ordinarily happens when the camera user exposes the sensor by removing the body cap or switching lenses.
Photographic camera sensors are dust magnets and notoriously decumbent to grit buildup if you're not careful, so you volition inevitably accept to clean your camera'south sensor every so often, or once you first to discern those annoying spots on your photos.
Why is sensor dust a problem?

If you're not professionally selling your photos, sensor dust really isn't a big deal. Every bit long equally you're satisfied with the photos, yous can just crop them out (if they're most the edges) or utilise Photoshop to become rid of them.
Just if you're a professional person photographer who takes hundreds of photos in a unmarried photo shoot, these quick fixes aren't appropriate since it would be too time-consuming to have to edit out sensor dust in every single motion picture. So, if you do this for a living, y'all'll have to keep your camera'southward sensor clean at all times.
Are self-cleaning sensors sufficient?
Yous tin can't always rely on new technology to assure you lot of a make clean digital photographic camera sensor. Many interchangeable lens cameras—DSLRs and MILCs—made in recent years have self-cleaning sensors that vibrate at ultrasonic speeds when the camera is turned on or off. This may help shake some of the dirt loose, simply information technology shouldn't be a substitute for manual sensor cleaning.
With a self-cleaning sensor, you may not need to make clean your sensor as often, just it still needs to be cleaned manually every in one case in a while to ensure that it'due south completely dust-free. Some photographers usually ship it in to the manufacturer's service eye for cleaning, merely due to the significant downtime (it volition take a while for yous to get your camera dorsum) and the expensive cost, near just end up doing it themselves.
If yous're planning on going the DIY road, you can find a lot of information online and elsewhere about how to make clean camera sensors, only I believe my sensor cleaning method is more thorough than any others I've seen.
Fifty-fifty with cocky-cleaning, sensor spots are actually more of an issue today than they were a few years ago. Image manipulations such as HDR or the tone mapping-like contrast increases, including those in many pop filters such every bit those from Nik and Topaz, volition show spots that you didn't notice before.
Is DIY sensor cleaning safe?
DIY sensor cleaning is completely condom. As long as you lot exercise it the right mode, yous shouldn't have whatever problems. Many photographers regularly do their own sensor cleaning without whatsoever problems. Yeah, there's always the adventure of dissentious the sensor if done incorrectly, but if you take a few basic precautions and handle your sensor with intendance, the potential for damage is pocket-size.
In that location has been a lot of argue on the merits of do-it-yourself versus sending it out when it comes to cleaning sensors. Having it cleaned by professionals is ultimately the easier option, simply as previously mentioned, it will price you coin and yous won't be able to utilise your camera for a certain menstruation of fourth dimension. I personally desire to be able to clean my sensor whenever necessary, which can be at inconvenient times, and I desire to have it done quickly. And, frankly, I call up I'd practice a better job than anyone else.
Sensor cleaning can be tedious, and it's a task that you wouldn't want to entrust to just anyone. Sometimes it gets worse earlier it gets better, but I'll stay at it until I'm satisfied with the results.
Knowing how to clean your own camera sensor is not only economical and convenient, simply ultimately more constructive and thorough considering yous are doing the work yourself. You can relieve a bundle (yous'll simply demand to spend on a reliable camera cleaning kit) and exercise a better job past cleaning your camera's sensor yourself.
How to check if your sensor is dirty
It's easy to find out how dirty the sensor is by shooting a clear heaven or a clean piece of paper. Information technology will give you an idea of what you lot'll need to clone out on the images, besides equally how badly y'all need to make clean the sensor.
1. Shoot a sensor check image
- Set your everyman "normal range" ISO (100 for Catechism and 200 for Nikon). Don't set a lower ISO that is in the "extended range." Yous'll get the lowest dissonance at your lowest normal ISO.
- You want the shot to be out of focus, so set manual focus and focus to infinity for a piece of paper and close-focus for the sky.
- Set to f/22, so any spots will be well defined. At a wider aperture such as f/5.6, they may not show, and at a smaller discontinuity such equally f/32, y'all may meet as well much item. (The spots are shadows of stuff that is on a glass surface in front end of the sensor itself.)
- If yous're shooting a piece of newspaper indoors, you lot'll have a slow shutter speed. That'southward fine; y'all want to mistiness the subject as much as possible anyhow, so go ahead and manus hold. Yous just want to shoot featureless lite.
- You want a somewhat telephoto focal length to shoot a small segment of the target and to minimize whatsoever tonal gradients. It depends on the evenness of the illumination of your target, of course, but lxx-100 mm is ordinarily fine.
- If y'all're a JPEG shooter, make sure you're using the highest quality and largest file size. (I would hope you are, anyway.)
2. Post-process to find the spots
Now here'south what to do with the test image (just looking at it on the back of the camera volition show the really atrocious spots):
- Open up the image on the computer and desaturate, either in the RAW converter or in Photoshop.
- Yous might encounter some spots at this indicate, only to really see what's there:
-Make a Levels adjustment layer higher up your Background image.
-Become to Layer > New Aligning Layer > Levels, or use the black and white circle icon at the bottom of the Layers panel/palette.

- In the Layer adjustment, the narrowness of the histogram peak volition signal how much tonal gradient you've captured. The narrower, the better, only no need to become it super narrow.
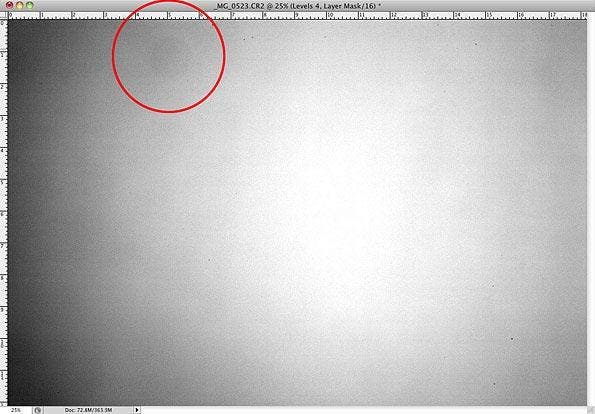
- Increase contrast by bringing in the two end sliders to meet the ends of the peak, and yous'll really run into what's on the sensor. You lot'll too see some darkening in the corners due to the normal light falloff in the lens.
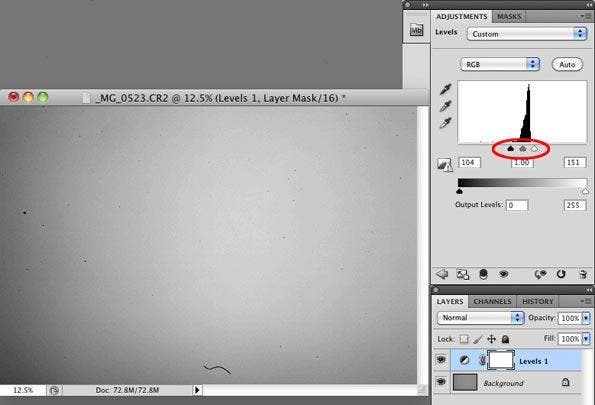
Hither, you tin can see a piece of lint bottom-middle and a spot on the left. There are many more spots that y'all can't see in this small web image.
The image a lens projects onto the sensor is upside-down, and when the photographic camera processes the image, it'south flipped right side upwardly. So the image of the sensor you run across has been flipped, and the slice of lint is actually at the summit of the sensor
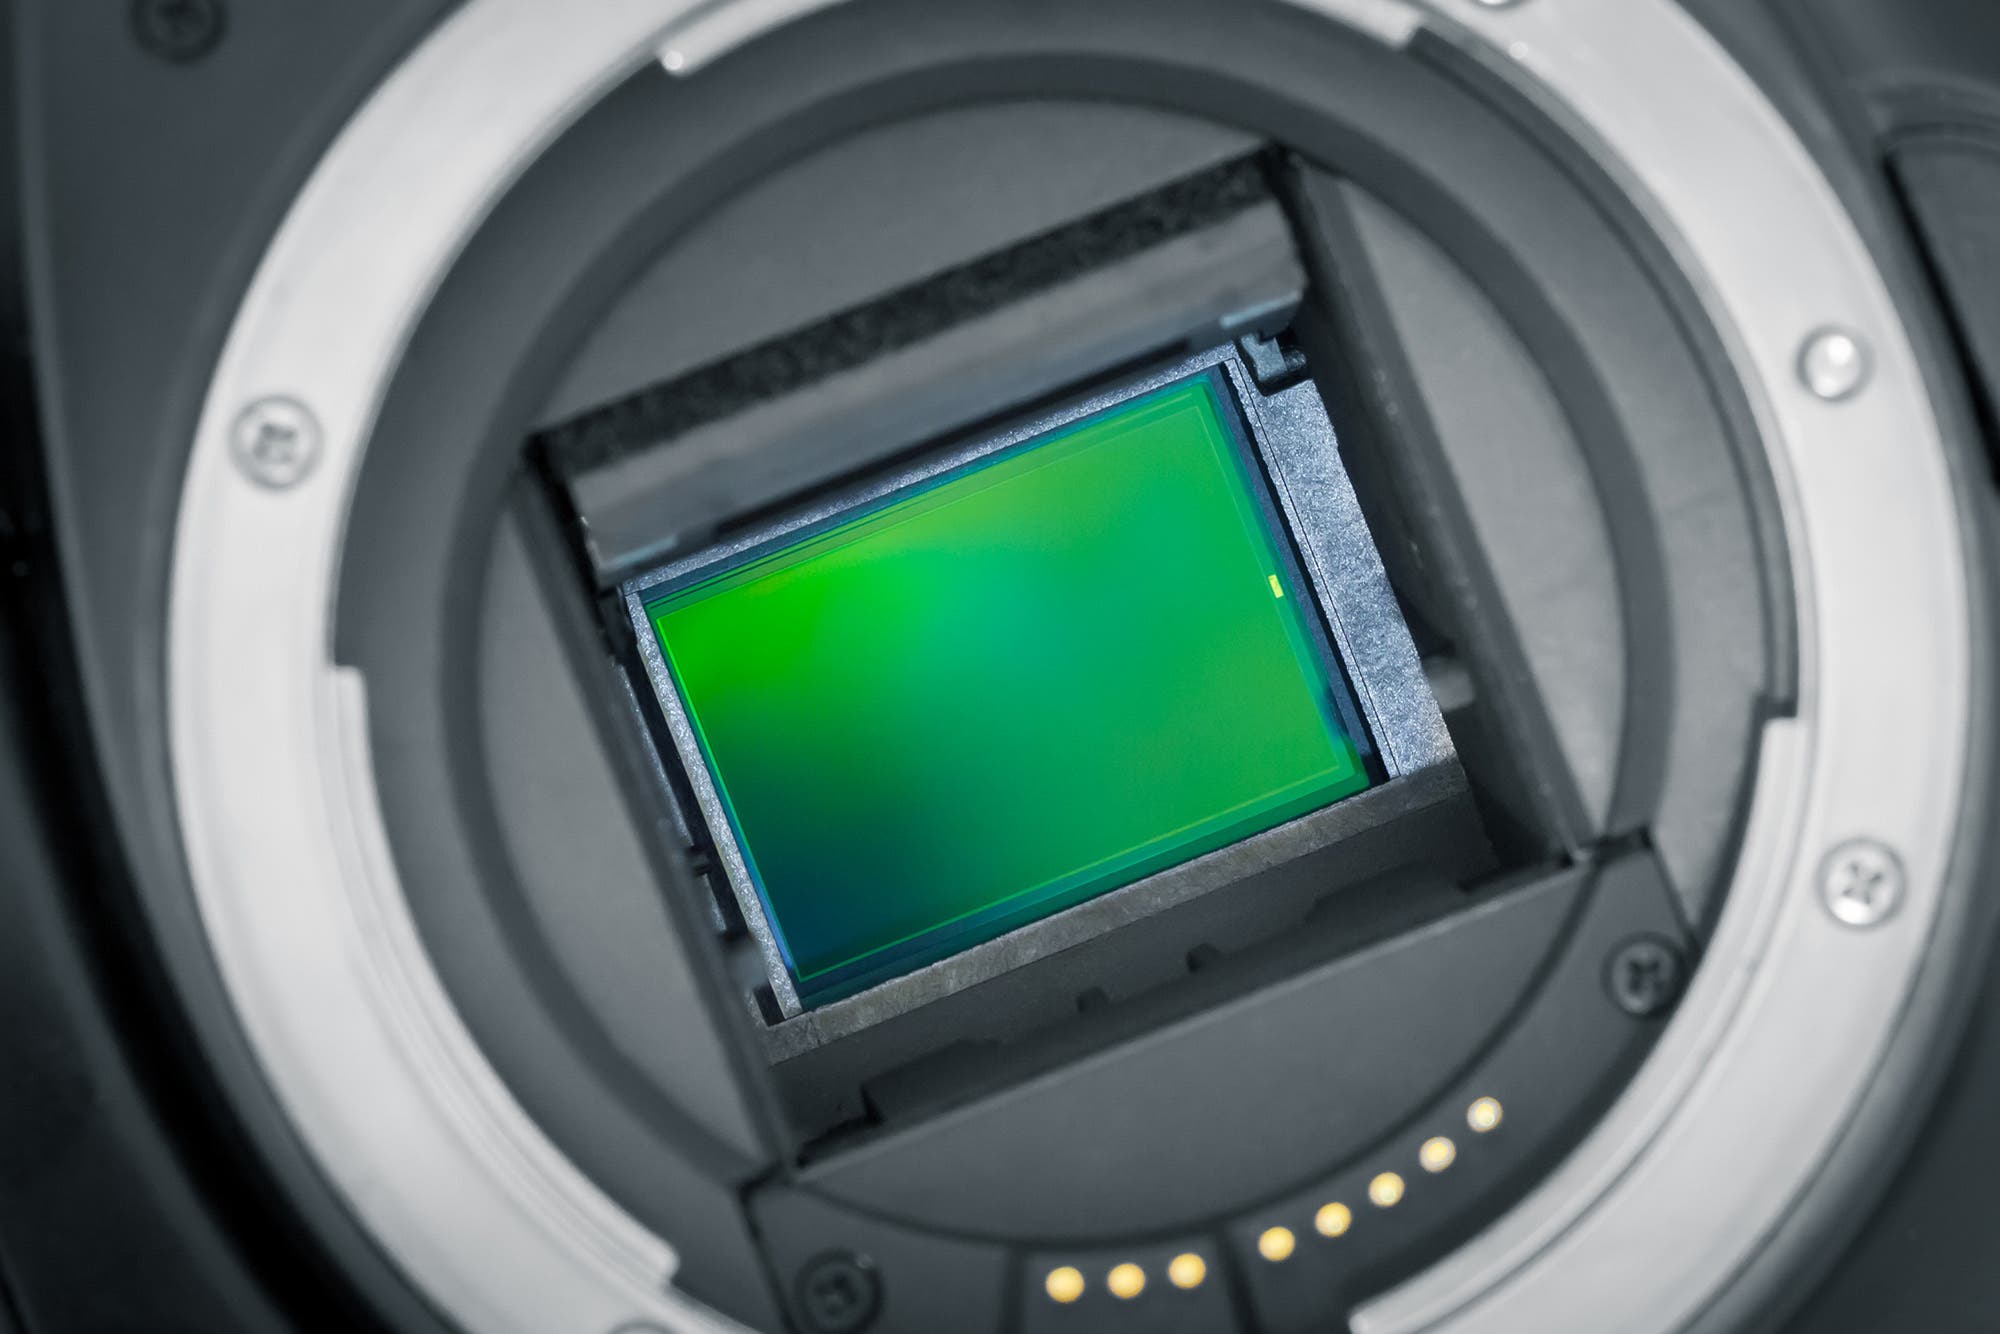
Seeing something like this, you know y'all demand to clean the sensor. Notice the item in your photographic camera menu that flips upwardly the mirror and lets you lot access the sensor.
What to practise before cleaning the sensor?
- Make sure you have a fully charged battery. If the battery runs out while you're working in the sensor chamber, the mirror will slap downward and you'll take to deal with a very expensive repair. The same goes for inadvertently nudging the card door plenty to "open up" it.
- Clean your photographic camera's outside body. It'southward important that you make clean the exterior before y'all move on to what's inside. If you fail to do and then, dust particles could enter your sensor.
- Observe cleanliness in the surface area. Brand sure that the place where you're going to make clean your DSLR photographic camera sensor is clean and grit-complimentary. You don't desire more than dust to add to the dirt that you're trying to remove.
- Gather all the necessary tools. Yous don't desire to start the sensor cleaning process and then realize later on that you don't have a certain tool. If you don't own a complete photographic camera cleaning kit yet, make sure to gather all the needed sensor cleaning tools before you lot proceed.
Dry cleaning method for DSLR photographic camera sensor:
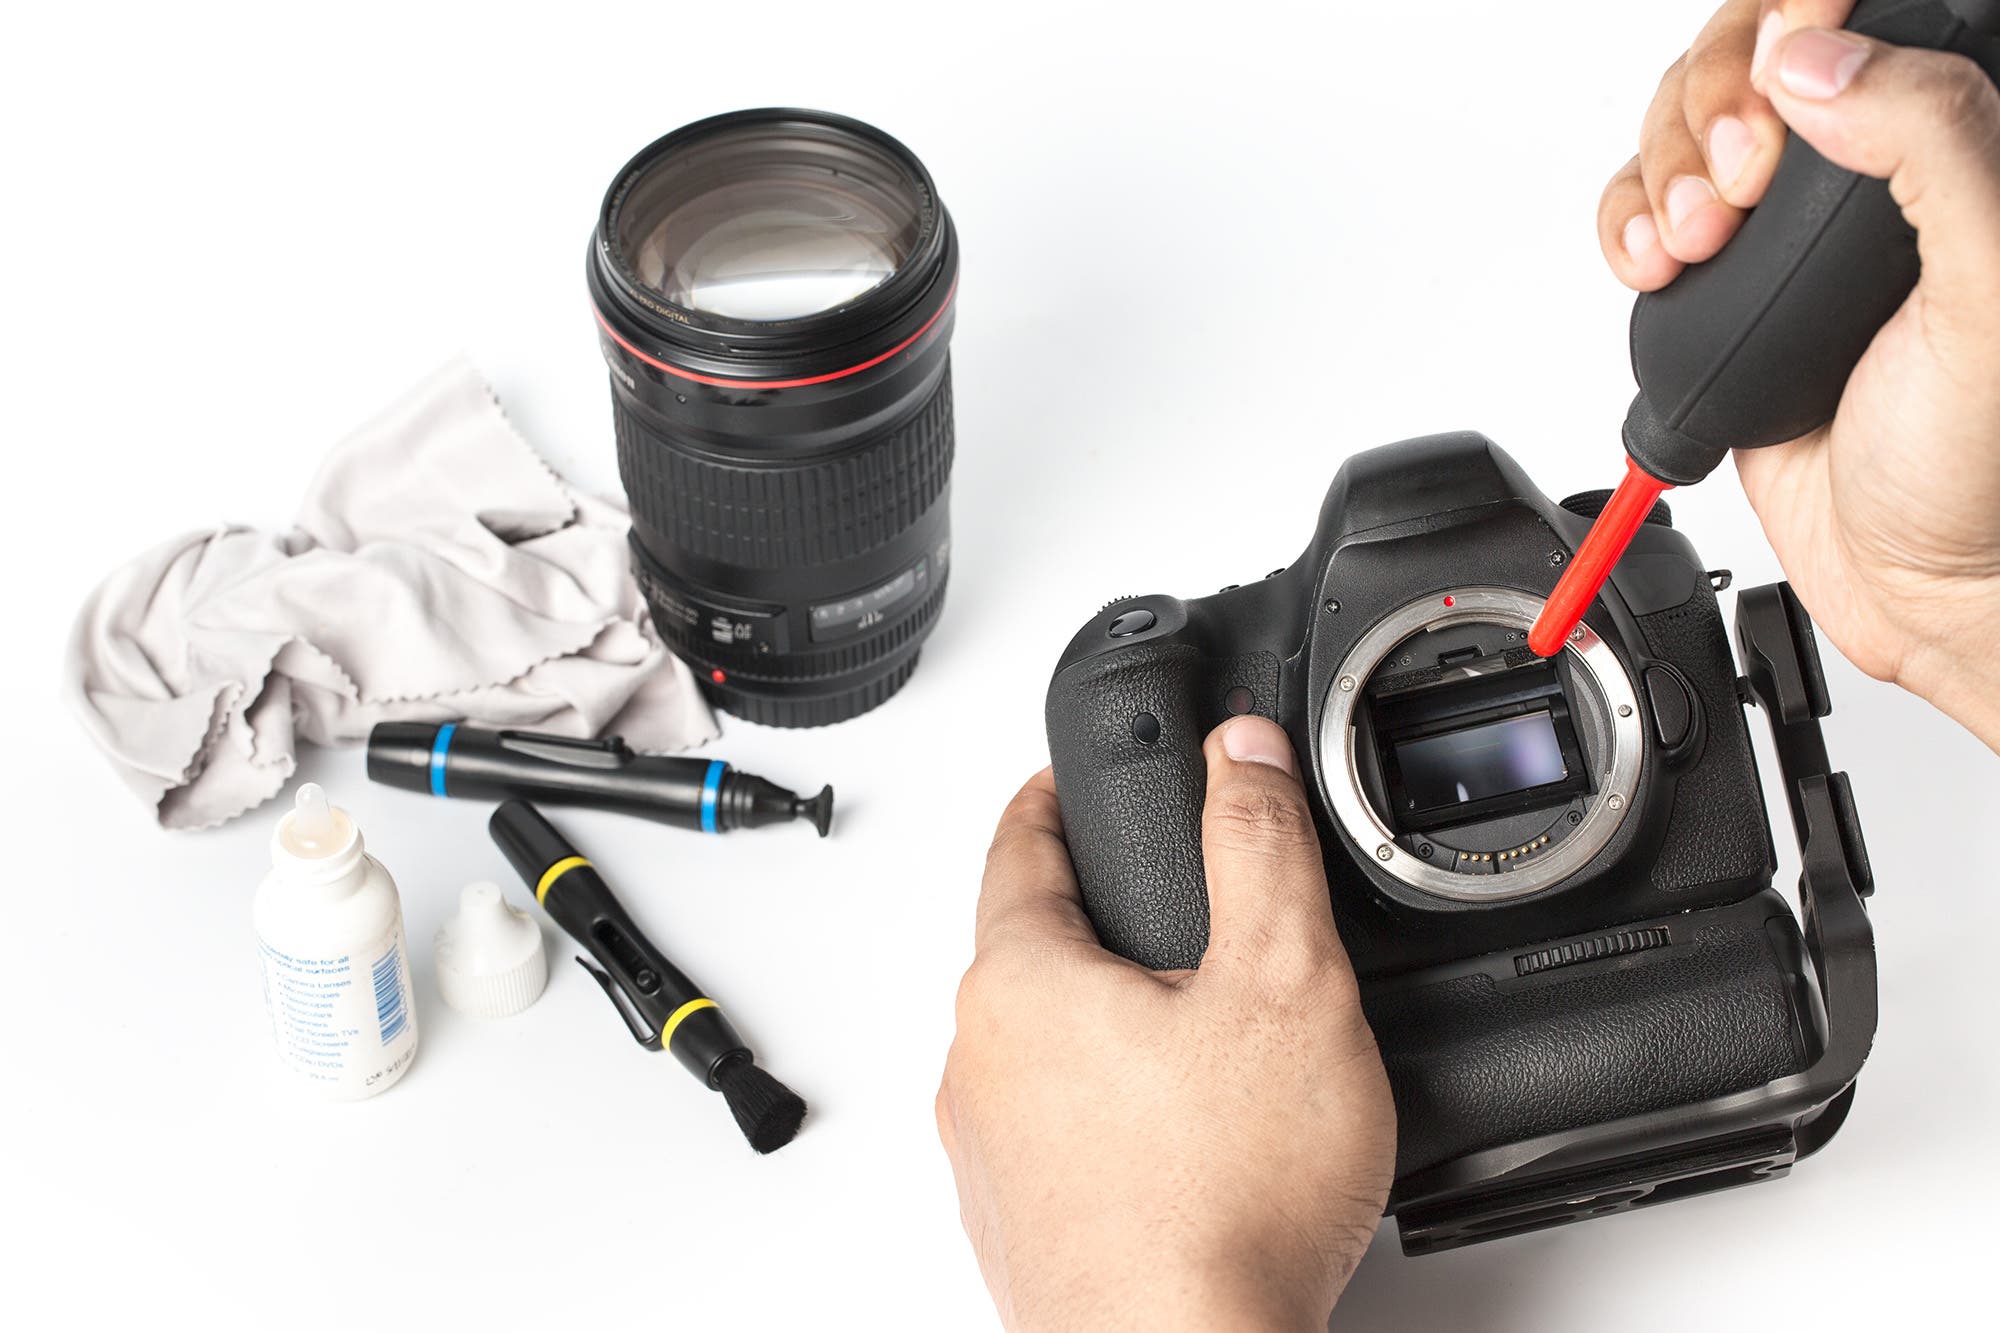
Tools for dry cleaning your camera sensor:
- Manual air blower to eliminate bigger dust particles
- Sensor scope to bank check for uncleared spots
How to clean camera sensor using the dry method:
- Lay the camera down on a table instead of holding information technology. Don't touch anything as you lot clean.
When I come across large dust pieces, I commencement the cleaning procedure by blowing on the sensor with an air bulb such as the Giottos rocket air blaster. (Doing so allows me to safely hold the camera and turn information technology upside downwards considering the bulb tip doesn't have to exist inside the sleeping room).Reminder: Never use canned air; the propellant tin create a residue on the sensor that will probably need professional removal. Large pieces volition often accident off and autumn out of the chamber.
- I'll accident on the mirror before I put it upwards. And I'll blow off the back of the lens, also. In that location'due south so much grit everywhere; I might as well get rid of whatsoever I can. The sensor has an electrostatic charge when the camera is on in its normal mode (just not in sensor cleaning mode) and information technology will attract dust like a magnet.
- At this point, I find a sensor scope very handy. Information technology's a magnifying glass with a light shining on the sensor (I like the Delkin sensor scope). You'll see sensor dust as tiny silver threads or spots.
- I'll repeat the air bulb and sensor scope check until I've gotten what I can, and then shoot a slice of newspaper to come across if I had any luck bravado off some of the smaller spots. Usually, the answer is no.
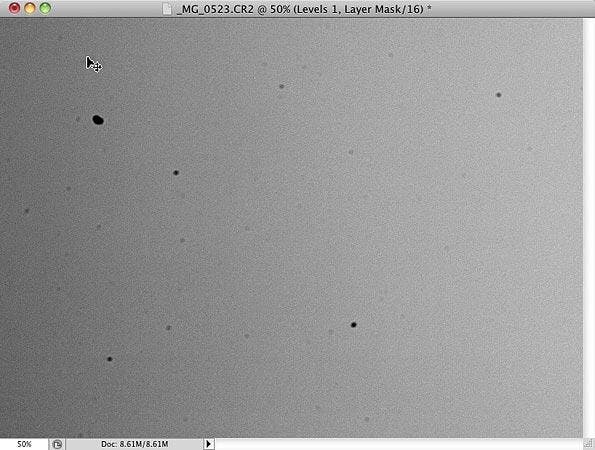
- I'll get after the smaller spots that I tin can encounter just in the Photoshop epitome. They may look much less significant, but they'll testify up when you exercise many image manipulations. Yous'll desire to zoom in on the epitome to see these smaller spots.
Here'due south a l% zoom of the to a higher place sensor bank check image. This is not a good thing. The smallest and lightest spots aren't of much significance, but the others are.
Wet cleaning method for DSLR camera sensor:
If that happens, the next step is to utilize a sensor cleaning brush. These are very special brushes whose bristles hold an electrostatic charge and attract particles off the sensor, rather than "sweeping" them off, so only a light touch is needed.
Reminder: These brushes demand to be kept very clean. You lot charge them correct before employ by blowing on the bristles with a squeeze bulb or by spinning the bristles with the battery-powered Visible Dust Arctic Butterfly. (Exercise not spin it while it is in the sensor sleeping room).
Tools for wet cleaning your DSLR camera sensor:
I use sensor cleaning products from Visible Dust, but I can't claim they're better than whatever other:
- Chill Butterfly brush
- Green swabs
- Sensor Clean solution
- Smear Abroad solvents
How to clean camera sensor using the wet method:
There is information on the manufacturer's website virtually sensor cleaning and proper use of its products. And the solvents (or at least some of them) are said to leave a coating on the sensor that helps repel dust and minimizes grit build-up.
Here are the steps to moisture clean your sensor:
- Read the product directions very advisedly.
- The swabs should be kept very make clean and should be carefully moistened right on the border, with two drops of solvent, each ane placed ane-4th of the way in from the edge, to evenly wet the edge.
- Let the solvent soak in a minute or then before swabbing. You don't want to clasp out liquid on the sensor drinking glass.
- Tilt the swab and drag it in one pass from ane border of the sensor to the other, and then plow it over and drag it back the other way, so the other side of the edge is being used. (Check the manufacturer'due south website for video demos.) You'll need some force per unit area with the swab, unlike the brush.
When to use the Smear Away and Sensor Clean solvent:
Brushing usually won't remove all the spots, and you'll need to resort to swabs and solvents. After brushing, y'all'll need to repeat the shot of the heaven or a piece of paper, and if you see an elongated smear, you've brushed through an oil spot thrown by the shutter.
In this example, y'all'll need to clean the castor in its recommended fashion before using it again, and you'll need to use solvents to remove the oil.
- If I encounter an oil smear, I use the Smear Away solvent, which needs to be followed by the Sensor Clean solvent. The swabs may go out lint, and then another loupe inspection is in society, followed by the blower and if, needed, the castor. (I have two, so if I brush through oil, I can continue cleaning.)
- If in that location is no oil smear, I just use Sensor Clean. Regardless of the solvent, it may have several passes, each with a clean swab, to get everything clean. And junk may exist pulled in from the edges of the sensor, making things worse before they become better. But they'll become better.
Finishing steps in cleaning a DSLR camera sensor:
At the stage when I tin no longer see any dust or spots with the loupe, I repeat the sensor bank check by shooting a piece of manifestly paper again. It may take several repetitions to get things clean, just I think it'southward worth the trouble.
There is another Visible Dust solvent that I tin't recommend: VDust. I'1000 not in the business of cleaning sensors, simply of the few I've done for friends, I've cleaned two that showed a very foreign look when the dissimilarity was increased with Levels, every bit if there'southward a liquid on the surface that didn't "wet" information technology.
In my first feel with this product, I used the person's cleaning kit, which included the VDust solvent. In the 2nd case, when I did an initial Levels check, I saw that same look and found the person had been using VDust according to directions, and the sensor had been in this status for many weeks.
In both cases, I used Sensor Make clean and managed to get the remainder off, only it took many passes with clean swabs each time. I take no idea what's going on here. Later on the first incident, I emailed the company, but they're not interested in my experience and insisted that the product was fine.
Sometimes, you'll see a much larger and dimmer spot on the sensor. Mine are e'er hexagonal, reflecting the aperture leaves in the lens. These are not on the sensor but are bits of dust or dirt on the lens, either the front or rear surfaces.
It's very important to keep the rear element of the lens and the sensor loupe clean, equally grit tin can jump or fall from them onto the sensor.
At that place are also products to clean the walls of the sensor bedchamber. Although at that place's no easy style to appraise their effectiveness, I'g in favor of keeping things as clean as I tin.
Tips for keeping your camera sensor clean:
Prevention is the ultimate cure. If you don't want to constantly worry nearly sensor dust, you lot demand to take steps to forbid it from finding its manner into your photographic camera.
- When irresolute lenses, brand sure information technology'southward done in a clean place where there's withal air. Always signal the camera toward the basis, so the grit particles (if there are whatever) won't land on your DSLR's sensor.
- Avert unnecessary irresolute of lenses. Also, make sure that the lens cap is clean before covering upward your lens eyes.
- Make sure your photographic camera'southward handbag is make clean. Make clean information technology one time in awhile to avoid dirt and dust buildup.
The sensor cleaning procedure tin be ho-hum. But how confident will you exist that, if you transport your camera out to exist cleaned, it will be done with sufficient attention to detail? At to the lowest degree, now you accept a means to check it after the fact.

Source: https://www.adorama.com/alc/the-secret-of-effectively-and-safely-cleaning-your-digital-camera-sensor-yourself/
Posted by: pollardwhictibed.blogspot.com
0 Response to "How To Clean Sensor On Camera"
Post a Comment